Standardizing Nutritional Biomarker Protocols: A Framework for Research and Drug Development
This article provides a comprehensive framework for standardizing nutritional biomarker measurement, tailored for researchers and drug development professionals.
Standardizing Nutritional Biomarker Protocols: A Framework for Research and Drug Development
Abstract
This article provides a comprehensive framework for standardizing nutritional biomarker measurement, tailored for researchers and drug development professionals. It covers foundational principles, from defining biomarkers and their classifications to exploring emerging multi-omics and AI technologies. The content details methodological best practices for specimen collection, storage, and analysis, alongside strategies for troubleshooting pre-analytical and biological confounders. Finally, it outlines rigorous protocols for validating biomarkers against dietary assessment tools and calibrating measurements for use in clinical research and nutritional epidemiology, aiming to enhance data reliability and cross-study comparability.
The Foundations of Nutritional Biomarkers: Definitions, Classifications, and Emerging Frontiers
Biomarker Fundamentals & Classification
What is the formal definition of a nutritional biomarker?
A nutritional biomarker is defined as a biological characteristic that can be objectively measured and evaluated as an indicator of normal biological processes, pathogenic processes, or responses to nutritional interventions [1]. These biomarkers provide objective data on dietary exposure and nutritional status, circumventing the fundamental limitations and measurement errors associated with self-reported dietary assessment methods [2].
How are nutritional biomarkers classified?
Nutritional biomarkers are typically classified into three main categories based on their application and what they assess [1]:
- Biomarkers of Exposure: These assess the intake of foods, nutrients, or other dietary constituents. They can be based on traditional dietary assessment methods or, more objectively, on dietary biomarkers themselves. They are intended to account for bioavailability.
- Biomarkers of Status: These measure the concentration of a nutrient in biological fluids or tissues, or the urinary excretion of the nutrient or its metabolites. They aim to reflect total body nutrient content or the status of the tissue store most sensitive to depletion.
- Biomarkers of Function: These measure the functional consequences of a nutrient deficiency or excess. They are subdivided into:
- Functional Biochemical Biomarkers: Such as the activity of a nutrient-dependent enzyme or the presence of abnormal metabolic products.
- Functional Physiological/Behavioral Biomarkers: Such as measures of vision, growth, immune function, or cognition.
Table 1: Classification of Nutritional Biomarkers with Examples
| Category | Sub-Category | What It Assesses | Examples |
|---|---|---|---|
| Biomarkers of Exposure | --- | Intake of nutrients, foods, or dietary patterns; takes bioavailability into account [1]. | Doubly labelled water for energy expenditure [2], Urinary nitrogen for protein intake [2]. |
| Biomarkers of Status | --- | Body pool size or tissue stores of a nutrient [1]. | Serum ferritin (iron stores), Plasma zinc, Plasma vitamin C [2]. |
| Biomarkers of Function | Functional Biochemical | Early functional consequences of deficiency; activity of nutrient-dependent systems [1]. | Erythrocyte glutathione reductase activity (riboflavin status), Methylmalonic acid (vitamin B12 status), Homocysteine (folate, B12, B6 status) [2] [1]. |
| Biomarkers of Function | Functional Physiological/Behavioral | Health outcomes or clinical functions impacted by nutritional status [1]. | Immune response to vaccination, Growth velocity, Cognitive function tests [1]. |
Another classification scheme, often used in validation studies, further distinguishes biomarkers as follows [2]:
- Recovery Biomarkers: Used to assess absolute intake based on metabolic balance (e.g., doubly labelled water, urinary nitrogen).
- Concentration Biomarkers: Correlated with intake but used for ranking individuals, not determining absolute intake (e.g., plasma carotenoids).
- Predictive Biomarkers: Predict intake with a dose-response relationship but have lower recovery (e.g., urinary sucrose and fructose).
Troubleshooting Common Laboratory Challenges
FAQ: Our biomarker measurements show high variability between replicates. What could be the cause?
High variability can stem from several sources related to specimen handling, assay technique, and equipment. A systematic troubleshooting approach is essential [3].
- Verify Pipette Calibration: Inaccurate pipettes are a common source of error. Ensure they are regularly calibrated and use proper pipetting technique [4].
- Check Reagent Quality and Storage: Molecular biology reagents are sensitive to improper storage. Confirm that all reagents have been stored at the correct temperature and have not expired. Visually inspect solutions for cloudiness or precipitation [3].
- Use Fresh Diluted Standards: Prepare new standard curves from fresh stock solutions to ensure accuracy [4].
- Assess Sample Homogenization: Ensure that vortex and resuspension steps are sufficient to create a homogenous sample [4].
- Repeat the Experiment: Unless cost-prohibitive, repeating the experiment can reveal if a simple mistake was made [3].
FAQ: We are getting unexpected negative results for a biomarker that should be present. How should we proceed?
- Confirm the Experiment Actually Failed: Review the scientific literature. Is there a plausible biological reason for the negative result? For instance, the biomarker might not be expressed in the specific tissue type being analyzed [3].
- Run Appropriate Controls: Always include a positive control (e.g., a sample with a known high level of the biomarker) and a negative control (e.g., a sample without the biomarker or with a control probe like bacterial dapB for RNAscope). If the positive control fails, the problem lies with the protocol or reagents, not the sample [3] [5].
- Check Equipment and Materials: Ensure reagents have been stored correctly and have not gone bad. Vendors can occasionally supply bad batches [3].
- Systematically Change Variables (One at a Time):
- Generate a list of potential culprits (e.g., fixation time, antibody concentration, number of wash steps).
- Change the easiest variable first. For example, adjust microscope settings before re-running the entire experiment [3].
- Test the most likely variable next. When testing concentrations, run a few in parallel on clearly labeled samples [3].
Table 2: Troubleshooting Guide for Common Biomarker Assay Issues
| Problem | Potential Causes | Recommended Solutions |
|---|---|---|
| No Amplification (e.g., in PCR) | Poor template quality/quantity, incorrect annealing temperature (Tm), degraded reagents [4]. | Check DNA/RNA quality (e.g., Nanodrop), perform a temperature gradient PCR, increase template concentration, use fresh reagents [4]. |
| Non-Specific Amplification or Staining | Annealing temperature too low, primer concentration too high, primer self-complementarity [4]. | Increase Tm temperature, lower primer concentration, follow primer design rules to avoid repeats [4]. |
| High Background Signal | Inadequate blocking, non-specific antibody binding, over-fixation of tissue [5]. | Optimize blocking conditions, use a validated negative control probe (e.g., dapB), titrate antibody concentrations, adjust protease treatment time [5]. |
| Low Signal Intensity | Low target abundance, insufficient antibody concentration, under-fixation, too many wash steps [3]. | Increase primary/secondary antibody concentration, check target expression levels, optimize fixation time, reduce number of washes [3]. |
| Amplification in Negative Control | Contaminated reagents (especially "homemade" polymerases), non-sterile techniques [4]. | Use new reagents, opt for commercial polymerases, ensure use of sterile tips and workspace [4]. |
Standardization & Best Practices
FAQ: What are the critical factors in specimen collection and handling that can confound biomarker interpretation?
The validity of a biomarker measurement is highly dependent on pre-analytical conditions. Key factors are summarized in the table below [1].
Table 3: Key Confounding Factors in Specimen Collection and Handling
| Factor | Impact on Biomarker | Standardization Strategy |
|---|---|---|
| Time of Day | Diurnal variation affects biomarkers with short half-lives (e.g., plasma zinc, iron) [2] [1]. | Collect samples from all participants at a standardized time of day [1]. |
| Fasting Status | Postprandial state can elevate fat-soluble biomarkers carried in lipoproteins [2]. | Standardize collection in a fasting state where required. |
| Specimen Type | Different specimens reflect different timeframes (serum: days; erythrocytes: months) [2]. | Pre-specify the biomarker's temporal relevance and choose specimen accordingly. |
| Storage Conditions | Repeated freeze-thaw cycles and incorrect temperature degrade biomarkers [2]. | Store in multiple aliquots at -80°C or in liquid nitrogen [2]. |
| Inflammation (Acute-Phase Response) | Inflammation can falsely alter nutrient concentrations (e.g., ferritin increases, zinc decreases) [6] [1]. | Measure CRP and AGP; apply statistical correction methods (e.g., BRINDA) [6] [1]. |
| Collection Materials | Trace elements can be contaminated by metals in tubes; some nutrients are photosensitive [2]. | Use trace-element-free tubes; protect light-sensitive nutrients (e.g., riboflavin) [2]. |
FAQ: What are the essential assay performance characteristics that should be reported for standardization?
Inconsistent reporting of laboratory methods is a significant barrier to pooling data and reproducing findings [6]. Complete disclosure is essential. The table below outlines key parameters often under-reported.
Table 4: Essential Assay Performance Characteristics for Reporting
| Assay Characteristic | Importance for Interpretation | Example of Good Reporting |
|---|---|---|
| Limit of Detection (LOD) / Lower Limit of Quantification (LLOQ) | Critical for interpreting low concentrations; values below LLOQ require special handling in analysis [6]. | Reporting the LOD (e.g., 0.5 mg/L for CRP) and describing how values below it were managed (e.g., imputed as LLOQ/√2) [6]. |
| Precision (Intra- & Inter-assay CV) | Indicates the reproducibility and reliability of the assay [6]. | Providing coefficient of variation (CV) percentages across the assay's reportable range [6]. |
| Assay Manufacturer & Platform | Identifies potential between-assay variation and allows for comparison [6]. | Naming the specific commercial kit, manufacturer, and product number [6]. |
| Data Handling for Unquantifiable Values | Prevents bias from excluding or improperly imputing data points outside the quantifiable range [6]. | Stating the method used (e.g., multiple imputation, substitution with a fixed value) [6]. |
| Quality Control (QC) Measures | Ensures the assay performed within expected parameters during the study [6]. | Reporting duplicate measurements and results of internal QC samples [6]. |
Essential Research Reagent Solutions
Table 5: Key Research Reagent Solutions for Nutritional Biomarker Analysis
| Reagent / Material | Critical Function | Application Notes |
|---|---|---|
| Enzyme-Linked Immunosorbent Assay (ELISA) Kits | Quantification of specific protein biomarkers (e.g., ferritin, CRP, AGP) [6]. | Many commercial kits lack adequate validation; select and report kits from reputable manufacturers carefully [6]. |
| Doubly Labelled Water (²H₂¹⁸O) | Gold-standard recovery biomarker for measuring total energy expenditure in free-living individuals [2]. | Expensive but provides objective validation of energy intake assessment. |
| Para-Aminobenzoic Acid (PABA) | Used to check the completeness of 24-hour urine collections, which are crucial for recovery biomarkers (nitrogen, potassium) [2]. | High recovery (>85%) indicates a complete collection [2]. |
| RNAscope Probes & HybEZ System | For in-situ hybridization to detect target RNA within intact cells, a functional molecular biomarker [5]. | Requires specific conditions (Superfrost Plus slides, defined mounting media, controlled humidity/temperature) [5]. |
| PCR Master Mixes | Pre-mixed solutions for PCR, containing buffer, dNTPs, polymerase, etc., for DNA amplification [4]. | Saves time and reduces contamination risk. Requires optimization of primer concentrations and annealing temperatures [4]. |
| ImmEdge Hydrophobic Barrier Pen | Creates a barrier on slides to keep tissue sections submerged in reagent during manual assays [5]. | Critical for assays like RNAscope; not all barrier pens are compatible [5]. |
| Meta-Phosphoric Acid | Acid used as a preservative to stabilize labile biomarkers like vitamin C in samples prior to analysis [2]. | Prevents oxidation and degradation of the analyte. |
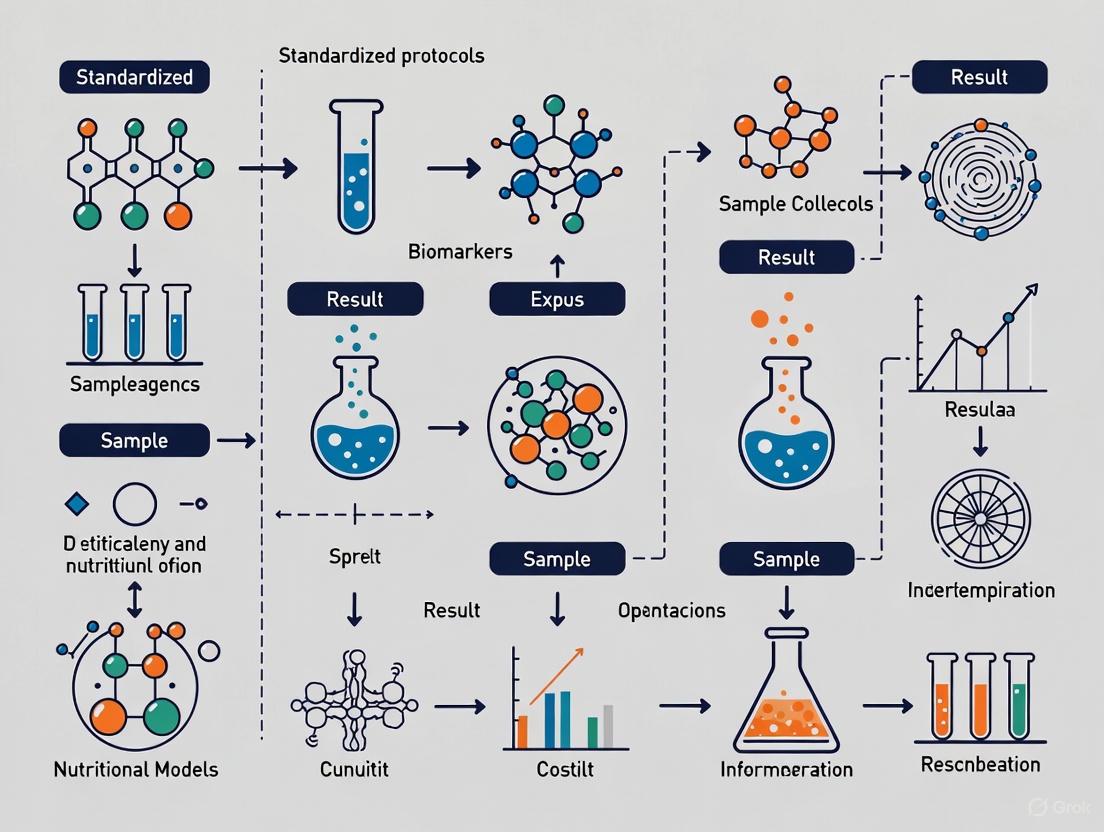
Visual Experimental Workflows
Workflow for Nutritional Biomarker Assessment
The following diagram outlines a generalized workflow for developing and applying nutritional biomarkers in research, from specimen collection to data interpretation, incorporating steps to address common confounders.
Biomarker Selection and Classification Logic
This diagram illustrates the decision-making process for selecting the appropriate category of nutritional biomarker based on the research question and the dimension of diet or nutrition being assessed.
Core Biomarker Classifications and Definitions
Biomarkers are objectively measured and evaluated characteristics that serve as indicators of normal biological processes, pathogenic processes, or pharmacological responses to therapeutic intervention [7]. The table below summarizes the core classifications relevant to nutritional research.
Table 1: Core Classifications of Biomarkers in Nutritional Research
| Classification | Definition | Primary Role in Research | Example in Nutrition |
|---|---|---|---|
| Recovery Biomarkers | Measures used to calibrate dietary intake measurements and correct for errors in self-reporting [8]. | To validate dietary assessment instruments and estimate actual intake [9]. | 24-hour urinary nitrogen as a biomarker for protein intake [8]. |
| Concentration Biomarkers | Reflect the concentration of a nutrient or compound in biological matrices, indicating relative intake or exposure [8]. | To assess nutritional status and exposure to specific dietary components. | Plasma alkylresorcinols for whole-grain intake; plasma carotenoids for fruit and vegetable intake [8]. |
| Predictive Biomarkers | Identify the likelihood of benefiting from a nutritional intervention or predict future health outcomes [10] [11]. | To stratify populations for targeted interventions and personalize nutrition strategies. | Genetic variants influencing nutrient metabolism; biomarker panels predicting response to a dietary intervention [12]. |
| Replacement Biomarkers | A subset of biomarkers that act as surrogate endpoints, substituting for a clinical endpoint [7] [13]. | To accelerate research by providing an interim measure of efficacy before a clinical outcome occurs. | Cholesterol levels as a surrogate for coronary artery disease risk; HbA1c as a surrogate for diabetes complications [13]. |
Methodologies and Experimental Protocols
Protocol for Validating a Recovery Biomarker (Urinary Nitrogen)
Intended Use: To validate self-reported protein intake and calibrate dietary measurement error in a cohort study [8] [9].
Workflow Overview:
Materials:
- Participants: Recruited cohort, fasted if required by protocol.
- Consumables: Pre-treated urine collection jugs (e.g., with boric acid as a preservative), barcoded specimen tubes [9].
- Equipment: Refrigerated storage, automated clinical chemistry analyzer.
- Reagents: Calibrators and controls for nitrogen measurement.
Detailed Procedure:
- Participant Preparation: Instruct participants on the precise 24-hour collection procedure, emphasizing the critical importance of a complete collection. The start and end times must be meticulously recorded.
- Sample Collection: Provide participants with a pre-treated collection jug. The entire 24-hour urine output must be collected and kept cool (e.g., in a refrigerator) during the collection period [9].
- Sample Processing: Upon return, the total volume of urine is measured. Multiple aliquots are created and stored at -70°C or below to ensure long-term stability of analytes [9].
- Analytical Measurement: Urinary nitrogen is typically measured using the Kjeldahl method or a validated colorimetric assay on an automated clinical chemistry analyzer. The analysis must include calibration standards and quality control (QC) pools to monitor assay performance [9].
- Data Calculation and Validation: Total urinary nitrogen (g/day) is calculated from the concentration and total urine volume. This value serves as a highly correlated biomarker for total protein intake. Data is cross-referenced with dietary questionnaires for calibration.
Protocol for Establishing a Predictive Biomarker
Intended Use: To discover and validate a biomarker panel that predicts an individual's glycemic response to a specific nutritional intervention.
Workflow Overview:
Materials:
- Cohorts: Well-characterized discovery and validation cohorts undergoing a controlled dietary intervention.
- Omics Platforms: Next-generation sequencing for genomics, mass spectrometry for proteomics/metabolomics [12].
- Data Analysis Tools: Bioinformatics pipelines, statistical software (R, Python), and potentially AI/machine learning algorithms [12].
Detailed Procedure:
- Discovery Phase: In a controlled feeding trial or deeply phenotyped cohort, collect baseline biological samples (e.g., blood, stool) for multi-omics analysis (e.g., genomics, metabolomics). Precisely measure the clinical outcome of interest (e.g., post-prandial glucose response) following a standardized nutritional challenge [12].
- Candidate Identification: Use univariate and multivariate statistical models to identify molecular features (e.g., specific metabolites, microbial taxa, genetic variants) that are significantly associated with the observed variation in the clinical outcome.
- Model Building: Integrate the top candidate features into a predictive algorithm using machine learning techniques. This model will output a probability or score for the expected response.
- Validation: Test the performance of the predictive algorithm in an independent cohort. The goal is to assess if the biomarker panel can accurately stratify participants as "responders" or "non-responders" to the intervention [10].
- Impact Assessment: Evaluate the population-level impact of using the biomarker for treatment selection by comparing outcomes under biomarker-guided strategy versus a one-size-fits-all approach [10].
Frequently Asked Questions (FAQs) & Troubleshooting
Q1: Our recovery biomarker data shows high intra-individual variability. How can we improve reliability? A1: High variability often stems from collection inconsistency.
- Solution: Implement rigorous participant training and use simplified collection protocols. For urinary biomarkers, consider collecting multiple non-consecutive 24-hour samples per participant to better estimate habitual excretion. Using para-aminobenzoic acid (PABA) tablets as a marker of completeness can help identify and exclude incomplete collections [8] [9].
Q2: We suspect our concentration biomarker is unstable during storage. How can we verify and address this? A2: Pre-analytical handling is critical for many biomarkers.
- Solution: Refer to literature on the stability of your analyte (e.g., Vitamin C and folate are highly sensitive). During sample processing, minimize exposure to light, heat, and repeated freeze-thaw cycles. Establish stability profiles by analyzing QC materials stored under your specific conditions over time. If a systematic assay shift is detected retrospectively, use long-term QC data to statistically correct the values [9].
Q3: What are the key considerations when proposing a nutritional biomarker as a replacement (surrogate) endpoint in a clinical trial? A3: The evidence bar is high for surrogate endpoints.
- Solution: A replacement biomarker must be rigorously qualified. You must provide strong epidemiological, therapeutic, and pathophysiological evidence that changes in the biomarker consistently and accurately predict a meaningful clinical benefit (e.g., reduced disease incidence) [7]. The context of use (COU) must be clearly defined, and it is critical to remember that a biomarker validated for one intervention may not work for another [7] [13].
Q4: Our predictive biomarker panel works well in our discovery cohort but fails in the validation cohort. What could be the reason? A4: This is a common challenge in predictive biomarker development.
- Solution: This often indicates overfitting of the initial model or cohort-specific biases. Ensure your discovery cohort is sufficiently large. Use cross-validation techniques during model development. The validation cohort must be truly independent and representative of the target population. Assess if there were differences in pre-analytical protocols, assay platforms, or population characteristics that could account for the performance drop [10] [14].
The Scientist's Toolkit: Essential Research Reagent Solutions
Table 2: Key Research Reagents and Materials for Biomarker Studies
| Reagent/Material | Function | Example Application & Consideration |
|---|---|---|
| Stabilized Collection Tubes | Preserves analyte integrity from collection to processing. | EDTA tubes for plasma; PAXgene for RNA; tubes with inhibitors for labile metabolites (e.g., vitamin C). Prevents pre-analytical degradation [9]. |
| Certified Reference Materials (CRMs) | Calibrates instruments and validates assay accuracy. | Essential for quantifying vitamins (e.g., NIST SRM for 25-hydroxyvitamin D) and minerals. Ensures results are traceable to international standards [9]. |
| Multiplex Assay Panels | Simultaneously measures multiple related biomarkers from a single sample. | Useful for profiling inflammatory cytokines, fatty acid panels, or phytoestrogen metabolites. Increases throughput and conservs precious sample [9]. |
| Quality Control (QC) Pools | Monitors assay precision and stability over time. | Prepared in-house from pooled donor samples. Run at multiple concentrations with each batch to track inter-assay variation and identify assay drift [9]. |
| DNA/RNA Extraction Kits | Isolves high-quality genetic material from various samples. | Required for genomic biomarker discovery (e.g., nutrigenetics). Must be selected based on sample type (blood, saliva, buccal cells) and downstream application (e.g., sequencing) [12]. |
| Stable Isotope Tracers | Allows precise tracking of nutrient absorption, distribution, and metabolism. | The gold-standard for studying nutrient kinetics (e.g., using 13C-labeled compounds to study fatty acid metabolism). Provides dynamic metabolic information [8]. |
Frequently Asked Questions (FAQs)
Q1: What is the core purpose of the BOND framework? The Biomarkers of Nutrition for Development (BOND) project is designed to provide evidence-informed advice on the selection, use, and interpretation of biomarkers of nutrient exposure, status, function, and effect. Its primary goal is to aid in generating evidence-based policy and to harmonize decision-making about which biomarkers are best suited for specific conditions and settings, thereby improving the assessment of nutritional status at both the individual and population levels [15] [16].
Q2: Why is it challenging to use serum retinol as a biomarker for vitamin A status? Serum retinol concentrations are under homeostatic control and are depressed during infection and inflammation because retinol-binding protein (RBP) is a negative acute-phase reactant. This makes it difficult to distinguish between true vitamin A deficiency and a temporary depression in concentration due to an inflammatory response [15].
Q3: What are some common laboratory-related sources of error in nutritional biomarker studies? Key sources of error include [6]:
- Specimen Handling: Inconsistencies in collection, processing, and storage (e.g., number of freeze-thaw cycles).
- Assay Performance: Lack of standardization and validation of laboratory methods and kits.
- Data Management: Inadequate handling of values below an assay's limit of detection (LOD) or lower limit of quantification (LLOQ).
- Incomplete Reporting: Failure to fully disclose assay protocols, performance characteristics, and technical limitations.
Q4: How can biomarkers be used to validate self-reported dietary intake methods? Biomarkers provide an objective measure that can circumvent the fundamental limitations of self-reported data, such as underreporting and misremembering. For example, the EPIC-Norfolk study showed a stronger inverse association between plasma vitamin C (a biomarker) and type 2 diabetes than between self-reported fruit and vegetable intake and the disease. This demonstrates how biomarkers can be used to calibrate or validate subjective dietary assessment tools [2].
Q5: What types of biological specimens are used for nutritional biomarkers, and what timeframes do they represent? Different biological specimens reflect intake over different periods [2]:
| Specimen | Timeframe of Intake Reflected |
|---|---|
| Urine | Short-term (hours to days) |
| Serum and Plasma | Short-term (days to a month) |
| Erythrocytes | Longer-term (up to 120 days) |
| Adipose Tissue | Long-term (months to years) |
| Hair and Nails | Long-term (months to years) |
Troubleshooting Guides
Issue 1: Inconsistent Biomarker Measurements Across Studies or Laboratories
| Potential Cause | Solution |
|---|---|
| Non-standardized assays: Use of different commercial kits or platforms with varying performance characteristics [6]. | Validate and report methods: Provide detailed information on assay manufacturers, product numbers, and protocols. Report precision estimates (intra- and inter-assay CVs) and limits of detection/quantification [6]. |
| Improper specimen handling: Degradation of analytes due to incorrect storage temperature, multiple freeze-thaw cycles, or exposure to light [2]. | Standardize SOPs: Implement detailed protocols for collection, processing, and storage. Store samples in multiple aliquots at -80°C or lower to minimize freeze-thaw cycles [2]. |
| Inflammation confounding results: Systemic inflammation can alter the concentration of nutrients like iron (ferritin) and vitamin A (retinol) [15] [6]. | Measure and adjust for inflammation: Include biomarkers of inflammation, such as C-reactive Protein (CRP) and α-1 acid glycoprotein (AGP), in the study design and apply statistical corrections [6]. |
Issue 2: Interpreting Biomarker Values Correctly
| Potential Challenge | Recommended Action |
|---|---|
| Values below the Limit of Quantification (LLOQ): A significant proportion of study samples may have unquantifiably low concentrations [6]. | Pre-specify data handling: Do not exclude these samples. Use statistically sound methods for handling them, such as substitution with LLOQ/√2 or multiple imputation, and conduct sensitivity analyses [6]. |
| Distinguishing between nutrient exposure and status: A concentration biomarker may reflect recent intake but not long-term nutritional stores [8] [2]. | Use a biomarker panel: Combine different types of biomarkers. For example, for Vitamin B12 status, measure both serum B12 (exposure/status) and methylmalonic acid (functional effect) to get a more complete picture [2]. |
| Lack of a single "gold standard" biomarker: For many nutrients, no one biomarker perfectly captures status [15]. | Use the BOND framework: Consult BOND reviews for expert advice on the best-suited biomarker for your specific research question, population, and setting. For vitamin A, multiple methods (serum retinol, RBP, isotope dilution) are related to the gold standard of liver vitamin A concentrations [15]. |
Table 1: Categories and Examples of Nutritional Biomarkers within the BOND Framework
| Category | Definition | Example Biomarkers |
|---|---|---|
| Exposure | Indicates intake of dietary constituents [8]. | Nitrogen in urine (protein intake) [8] [2]; Alkylresorcinols in plasma (whole-grain intake) [8]. |
| Status | Reflects the body's store and availability of a nutrient [2]. | Serum ferritin (iron stores); Serum retinol (vitamin A status) [15] [2]. |
| Function | Indicates a biological function that is dependent on the nutrient [8]. | Methylmalonic acid (vitamin B12 function) [2]; Erythrocyte glutathione reductase activity (riboflavin status) [2]. |
| Effect | Reflects a health outcome or disease state influenced by nutrition. | Hemoglobin concentration (anemia); Xerophthalmia (vitamin A deficiency) [15]. |
Table 2: Biomarker Laboratory Assay Reporting Standards Based on a review of 20 articles, key assay characteristics are often under-reported [6]:
| Laboratory Assay Characteristic | Percentage of Publications Reporting it |
|---|---|
| Specific Analyzer and/or Assay Manufacturer | 80% |
| Inter-assay and/or Intra-assay Coefficient of Variation (CV) | 35% |
| Limit of Detection (LOD) and/or Lower Limit of Quantification (LLOQ) | 20% |
| Duplicate Measurements Performed for Each Sample | 10% |
Experimental Protocols
Protocol 1: Assessing Vitamin A Status Using the BOND Framework
Background: No single biomarker provides a perfect assessment of vitamin A status. The BOND review recommends a context-specific approach [15].
Methodology:
- Specimen Collection: Collect non-fasting blood sample via venipuncture. Protect from light. Process to obtain serum or plasma and store at -80°C in aliquots [15] [2].
- Primary Biomarker of Status/Exposure:
- Functional Biomarker:
- Analyte: Breast-milk retinol (in lactating women) is a functional indicator of vitamin A status in both mother and infant [15].
- Advanced/Reference Methods:
- Dose-response tests: Measure the rise in serum retinol after a physiological dose of vitamin A.
- Isotope dilution: Considered a more robust measure of total body stores [15].
Protocol 2: Validating a Food Frequency Questionnaire (FFQ) Using a Recovery Biomarker
Background: Self-reported dietary data is prone to error. Recovery biomarkers, like doubly labeled water for energy intake, provide an objective measure to validate these instruments [2].
Methodology (Using 24-hour Urinary Nitrogen as a Recovery Biomarker for Protein Intake):
- Participant Preparation: Instruct participants to collect all urine for a strict 24-hour period.
- Compliance Monitoring: Administer para-aminobenzoic acid (PABA) tablets to assess completeness of collection. A recovery of >85% indicates a complete sample [2].
- Specimen Handling: Pool the total 24-hour urine volume, aliquot, and store frozen.
- Laboratory Analysis: Analyze urinary nitrogen concentration using the Kjeldahl method or chemiluminescence.
- Data Analysis:
- Calculate total urinary nitrogen (TUN) excretion over 24 hours.
- Calculate protein intake using the formula: Protein (g/day) = (TUN (g/day) + 2) * 6.25, where the constant 2 accounts for non-urinary nitrogen losses.
- Compare this biomarker-derived protein intake estimate with the intake reported from the FFQ to assess the validity and calibration of the FFQ [2].
Workflow and Relationship Diagrams
BOND Biomarker Cascade
Biomarker Analysis Workflow
The Scientist's Toolkit: Essential Research Reagents & Materials
Table 3: Key Reagents and Materials for Nutritional Biomarker Studies
| Item | Function & Application | Key Considerations |
|---|---|---|
| Serum/Plasma Tubes | Collection of blood for analysis of most vitamins (e.g., A, B12), minerals, and inflammatory markers. | Use trace-element-free tubes for mineral analysis. Specify anticoagulant for plasma (e.g., EDTA, Heparin) [2]. |
| Urine Collection Jugs | 24-hour urine collection for recovery biomarkers (Nitrogen, Potassium, Sodium). | Use opaque, pre-acidified jugs for analytes sensitive to degradation. Include PABA tablets to monitor compliance [2]. |
| Cryogenic Vials | Long-term storage of biological specimens at ultra-low temperatures. | Use O-ring seals to prevent freezer burn. Store in multiple aliquots to avoid repeated freeze-thaw cycles [6] [2]. |
| ELISA Kits | Immunoassay for quantifying proteins (e.g., Ferritin, RBP, CRP, AGP). | Select kits that have been independently validated. Report manufacturer, product number, and performance characteristics (CV, LLOQ) [6]. |
| HPLC Columns & Standards | Separation and quantification of specific molecules (e.g., retinol, carotenoids, tocopherols). | Required for precise measurement of many micronutrients. Use internal standards to correct for recovery [15]. |
| Quality Control (QC) Pools | Monitor assay precision and accuracy across multiple analytical runs. | Include high, medium, and low concentration QC samples in each batch to detect assay drift [6]. |
| Stabilizing Additives | Prevent degradation of labile analytes during processing and storage. | Example: Meta-phosphoric acid to stabilize vitamin C in plasma [2]. |
FAQs: Navigating Multi-Omics and AI Integration
1. What are the primary data integration challenges in multi-omics studies, and how can AI address them? A major challenge is the horizontal integration of unmatched data from different cells or the vertical integration of multiple data types from the same sample [17]. AI frameworks, such as the dual-path graph attention auto-encoder (SSGATE), are being developed to effectively integrate single-cell and spatial multi-omics data, helping to reconcile these different data structures [17].
2. How can I prevent overfitting when training AI models on high-dimensional multi-omics data? Overfitting occurs when a model is too complex for the amount of data. To mitigate this, ensure your experimental design has sufficient biological replicates [18]. During analysis, employ variable selection methods like shrinkage and control for multiple comparisons using measures such as the false discovery rate (FDR) [19]. Using a panel of continuous biomarkers, rather than a single dichotomized one, can also help retain maximal information and improve model generalizability [19].
3. Our discovered biomarkers lack clinical utility. How can we better align discovery with application? A clearly defined Context of Use (COU) is critical from the outset. The COU specifies the biomarker's category and its intended decision-making purpose [20]. The study design, statistical analysis plan, and acceptable levels of measurement error are all dependent on this context. Studies that only show group differences, without demonstrating utility for individual-level decision-making, are insufficient for validation [20].
4. What are the key considerations for analytical validation of a biomarker assay? Analytical validation establishes the technical performance of the assay itself. It requires evaluating performance characteristics such as sensitivity, specificity, accuracy, and precision according to a specified technical protocol [20]. Key parameters to report include the lower limit of detection (LOD), lower limit of quantification (LLOQ), and intra- and inter-assay coefficients of variation (CV) [6].
5. Why is data standardization and sharing so important in this field? Adopting FAIR (Findable, Accessible, Interoperable, and Reusable) data principles is fundamental for scientific progress [21]. Standardized data allows for validation of results, facilitates the pooling of datasets for larger meta-analyses, and provides the vast, high-quality datasets needed to train robust AI models, as exemplified by the development of AlphaFold [21].
Troubleshooting Guides
Issue 1: Inconsistent or Irreproducible Biomarker Measurements
Problem: Biomarker measurements vary significantly between batches, labs, or sample collection events.
Solution:
- Standardize Pre-Analytical Protocols: Implement and document detailed, standardized procedures for specimen collection, handling, and storage. For nutritional biomarkers, this is critical due to analyte instability [6] [18].
- Implement Rigorous Analytical Validation: Before clinical validation, thoroughly assess your assay's precision, sensitivity, specificity, LOD, and LLOQ [20]. Use technical replicates to calculate intra- and inter-assay CVs.
- Control for Biological Confounders: Account for factors known to affect nutritional biomarkers, such as inflammation (e.g., by measuring C-reactive protein), age, and sex, in your experimental design and statistical analysis [6] [22].
- Apply Randomization and Blinding: Randomly assign cases and controls to testing plates or batches to control for technical "batch effects." Blind laboratory personnel to clinical outcomes to prevent assessment bias [19].
Issue 2: Poor Performance of AI/ML Models in Clinical Validation
Problem: A biomarker signature that performed well in the discovery cohort fails to generalize to an independent patient population.
Solution:
- Define Context of Use Early: Ensure your discovery phase is tailored to a specific COU (e.g., prognostic vs. predictive). A predictive biomarker, for instance, must be identified through a test of interaction with a treatment in a randomized trial [19].
- Avoid Overfitting with Proper Study Design: Power your study with an adequate number of samples and clinical events. Use data from prospective trials or well-curated sample banks where possible [19] [18].
- Utilize Advanced Visualization Tools: Employ tools like 3D IntelliGenes to create configurable 3D scatter plots. This helps visualize disease state distributions, classifier bias, and patient similarity, allowing you to identify outliers and assess model generalizability before clinical validation [23].
- Ensure Rich Metadata: Capture comprehensive metadata at every experimental step. This provides the necessary context for AI models and other researchers to correctly interpret and reuse the data, minimizing the risk of false assumptions [21].
Issue 3: Ineffective Visualization and Interpretation of Multi-Dimensional Data
Problem: It is difficult to visualize and communicate the complex relationships within multi-omics datasets.
Solution:
- Adopt Multi-Dimensional Visualization: Move beyond traditional 2D plots. Use platforms that offer 3D visualization to capture both linear and non-linear structures in the data, which can reveal patient clusters and model errors that would otherwise be missed [23].
- Prioritize Accessibility in Charts: When creating charts, ensure sufficient color contrast. A creative solution is to use elements like high-contrast end caps on graph bars, which allows the use of a broader, more visually distinct palette while remaining accessible to colorblind and low-vision users [24].
- Perform Joint Feature Analysis: Use feature plotting modules to analyze the interdependence and discriminative power of pairs of multi-omics features, such as co-expressed biomarkers [23].
Essential Data Analysis Metrics
When evaluating biomarker performance, the choice of metric depends on the intended use. The table below summarizes key statistical measures.
Table 1: Key Statistical Metrics for Biomarker Evaluation [19]
| Metric | Description | Application |
|---|---|---|
| Sensitivity | Proportion of true cases correctly identified. | Diagnostic and screening biomarkers. |
| Specificity | Proportion of true controls correctly identified. | Diagnostic and screening biomarkers. |
| Positive Predictive Value (PPV) | Proportion of test-positive individuals who have the disease. | Informs clinical utility; depends on prevalence. |
| Negative Predictive Value (NPV) | Proportion of test-negative individuals who do not have the disease. | Informs clinical utility; depends on prevalence. |
| Area Under the Curve (AUC) | Overall measure of how well the biomarker distinguishes cases from controls. | General assessment of diagnostic/prognostic accuracy. |
| Calibration | How well the biomarker's predicted risks match observed risks. | Critical for risk stratification biomarkers. |
| Hazard Ratio (HR) | Measure of the magnitude and direction of the effect on a time-to-event outcome. | Primary metric for prognostic biomarkers. |
Experimental Workflow for Multi-Omics Biomarker Discovery
The following diagram outlines a robust workflow from experimental design to clinical application, incorporating steps to address common pitfalls.
Data Preprocessing for AI-Ready Datasets
A crucial step before AI model training is the preprocessing of raw multi-omics data. This workflow ensures data quality and interoperability.
The Scientist's Toolkit: Research Reagent Solutions
Table 2: Essential Materials and Resources for Multi-Omics Biomarker Research
| Item / Resource | Function / Application |
|---|---|
| Mass Spectrometry | High-throughput identification and quantification of proteins (proteomics) and metabolites (metabolomics) [17] [18]. |
| Next-Generation Sequencing (NGS) | Profiling genomic, transcriptomic, and epigenomic data. Single-cell NGS allows resolution at the individual cell level [19] [17]. |
| Spatial Transcriptomics | Capturing gene expression data while preserving the spatial location of cells within a tissue section [17]. |
| Antibody-based Assays (e.g., ELISA) | Targeted measurement of specific protein biomarkers. Requires careful validation to ensure specificity [6]. |
| 3D IntelliGenes Software | An AI/ML application for creating interactive 3D visualizations of multi-omics data to assess disease states and model performance [23]. |
| FAIR Data Management Plan | A framework to ensure data is Findable, Accessible, Interoperable, and Reusable, which is crucial for collaboration and AI training [21]. |
| Relational Database | A data management system to logically link rich metadata from multi-step, multi-omics experiments, ensuring traceability and context [21]. |
The Critical Role of Standardization in Precision Nutrition and Clinical Trials
FAQs: Core Concepts and Common Challenges
Q1: What is the fundamental difference between precision nutrition and traditional dietary advice?
Precision nutrition is an approach that uses individual data—including genetics, microbiome, metabolic profile, and lifestyle—to predict a person's response to specific foods and deliver tailored dietary recommendations [25] [26]. Unlike traditional "one-size-fits-all" dietary guidelines, it recognizes that healthful eating varies between individuals and changes over time [25]. It leverages high-throughput omics technologies (genomics, metabolomics, proteomics) and data analytics to develop dynamic, personalized interventions [27] [26].
Q2: Why is standardization so critical in precision nutrition research?
Standardization is essential because a lack of consensus on protocols and reference values hinders the clinical translation of biomarkers [28]. Without standardized measurement techniques, results from different studies cannot be reliably compared or validated, which limits the development of actionable clinical guidelines and creates reproducibility challenges [28] [27]. Standardized metrics enhance oversight and decision-making in clinical trials, though they must sometimes be supplemented with study-specific indicators to capture unique risks [29].
Q3: What are the main biomarkers used in precision nutrition, and what standardization challenges do they face?
The table below summarizes key biomarkers and associated standardization challenges.
Table 1: Key Biomarkers in Precision Nutrition and Standardization Challenges
| Biomarker | What It Measures | Primary Standardization Challenges |
|---|---|---|
| Epigenetic Clocks [28] | Biological age based on DNA methylation patterns | Lack of clinical validation; no consensus on standardized protocols or reference values [28]. |
| Telomere Length [28] | Cellular aging and chronic disease risk | Variability in measurement techniques; lack of standardized reference values [28]. |
| Metabolomic Profiles [30] [26] | Real-time metabolic shifts and responses to diet | Methodological inconsistencies in profiling and data analysis; integrating multi-omics data [27] [26]. |
| Gut Microbiome [25] [26] | Microbial diversity and function via metagenomics | Variability in sequencing and analysis methods; high inter-individual diversity [26]. |
Q4: My omics data shows statistically significant associations, but how do I determine if they are clinically relevant?
This is a common challenge in translational research. Statistically significant associations alone are insufficient for clinical application [25]. To assess clinical relevance, you must evaluate the effect size and predictive power of the findings. Research should demonstrate that the biomarker or signature can accurately predict a meaningful health outcome or response to a dietary intervention in a controlled setting [25]. Furthermore, the underlying algorithms must have robust validation and clinical relevance before being incorporated into products or services [25].
Troubleshooting Guides: Experimental Issues and Solutions
Issue 1: Inconsistent Biomarker Measurements Across Labs
Problem: Measurements of the same biomarker (e.g., telomere length) yield inconsistent results when protocols differ between laboratories [28].
Solution:
- Adopt a Standardized Protocol: If available, use a consensus protocol from your field. Current guidelines recommend combining biomarkers like telomere length and epigenetic age with other molecular data within integrative assessment approaches [28].
- Use Common Reference Materials: Implement internal controls and reference standards across all runs and sites to calibrate measurements.
- Cross-Validate Techniques: Periodically compare results from your lab's method with a gold-standard reference method, if one exists.
Issue 2: High Variability in Postprandial Response Data
Problem: Significant inter-individual variability in metabolic responses to the same meal makes it difficult to identify consistent patterns or draw general conclusions.
Solution:
- Deep Phenotyping: Collect comprehensive data on participants (genetics, baseline metabolism, microbiome) to stratify responses into distinct metabotypes [26].
- Standardize Test Conditions: Control for variables that significantly impact metabolic response, such as:
- Time of day and circadian rhythm [26]
- Prior physical activity and fasting status
- Exact composition and format of the test meal
- Leverage Multi-omics Integration: Use integrated omics approaches to move beyond single biomarkers and understand the complex network of interactions contributing to the observed variability [27] [31].
Issue 3: Translating Omics Findings into Clinically Actionable Advice
Problem: Research identifies promising genetic or metabolomic signatures, but translating them into practical, effective, and safe dietary recommendations for individuals remains difficult [27].
Solution:
- Validate in Randomized Controlled Trials (RCTs): Design RCTs to test whether interventions based on the specific signature lead to improved health outcomes compared to standard care [26].
- Follow Reporting Guidelines: Adhere to updated consensus guidelines like CONSORT 2025 for reporting trials and SPIRIT for trial protocols to ensure transparency and reproducibility [32] [33].
- Assess Real-World Usability: Evaluate whether the resulting intervention is feasible, understandable, and actionable for the target audience, considering their food environment and socioeconomic status [25] [26].
Standardized Experimental Protocols
Protocol: Implementing a Precision Nutrition Randomized Controlled Trial
This protocol is structured according to the updated SPIRIT 2013 framework, which defines standard items for clinical trial protocols [32].
Table 2: Key Protocol Elements for a Precision Nutrition RCT
| Protocol Item | Description and Application |
|---|---|
| Trial Design | Specify type (e.g., parallel, factorial), allocation ratio, and framework (e.g., superiority). Clearly state the randomization method [34]. |
| Eligibility Criteria | Define criteria for participants and, critically, for sites and individuals delivering the intervention to ensure consistency [33]. |
| Interventions | Describe each intervention with sufficient detail to allow replication, including the method of personalization (e.g., algorithm, biomarker cutoff) [34] [33]. |
| Outcomes | Define primary and secondary outcomes clearly. For precision nutrition, these may include biomarker changes, clinical endpoints, and patient-reported outcomes [34]. Use the SPIRIT-Outcomes extension for guidance [32]. |
| Statistical Methods | Make the statistical analysis plan accessible prior to trial commencement. Specify how inter-individual variability will be modeled and define who is included in each analysis [33]. |
| Harms | Plan for the assessment and reporting of potential harms or adverse events related to the personalized dietary advice [33]. |
| Data Sharing | Include a plan for sharing de-identified participant data, as this is a new item in modern guidelines like CONSORT 2025 [33]. |
Signaling Pathways and Workflows
Diagram: From Standardization Gaps to Research Impacts
Diagram: Multi-Omics Integration Workflow
The Scientist's Toolkit: Research Reagent Solutions
Table 3: Essential Research Reagents and Kits for Precision Nutrition
| Tool / Reagent | Function | Key Considerations |
|---|---|---|
| DNA Methylation Kits [28] | Quantify epigenetic age using epigenetic clocks. | Select kits that target established, published CpG sites; ensure batch-to-batch consistency. |
| Telomere Length Assay Kits [28] | Measure telomere length as a biomarker of cellular aging. | Prefer high-throughput qPCR methods; use internal controls to normalize results across runs. |
| Metabolomic Profiling Panels [30] [26] | Identify and quantify small molecule metabolites in bio-fluids. | Choose targeted panels for specific pathways or untargeted for discovery; standardize sample preparation. |
| Metagenomic Sequencing Kits [25] [26] | Characterize the gut microbiome composition and function. | Use shotgun sequencing for functional insight; standardize DNA extraction and bioinformatics pipelines. |
| Continuous Glucose Monitors (CGM) [25] | Monitor real-time interstitial glucose levels. | A wearable device, not a reagent; crucial for validating personalized metabolic responses. |
Methodological Best Practices: From Specimen Collection to Analysis
Specimen Selection Guide and Biomarker Applications
The selection of an appropriate biological specimen is fundamental to the accuracy and reliability of nutritional biomarker measurement. Different specimens offer unique windows into nutritional status, reflecting varying aspects of exposure, metabolism, and long-term storage.
Table: Comparison of Biological Specimens for Nutritional Biomarker Analysis
| Specimen Type | Key Biomarkers | Strengths | Limitations | Reflective Timeframe |
|---|---|---|---|---|
| Plasma/Serum | Carotenoids, Vitamins (A, E), Isoflavones, Fatty Acids, Holotranscobalamin (B12) | Captures recent dietary intake and current metabolic status [35]. | Concentrations can be transient, influenced by recent meals and lipid transport [35] [36]. | Short-term (hours to days) |
| Urine | Isoflavones, Enterolactone, 1-Methylhistidine (meat intake marker) [35] | Non-invasive collection; good for measuring excretion of water-soluble biomarkers and metabolites [35] [37]. | Requires normalization (e.g., to creatinine); concentration varies with hydration. | Short-term (hours) |
| Erythrocytes (RBC) | α-Tocopherol (Vitamin E), Fatty Acids [36] | Longer lifespan (~120 days) provides a medium-term indicator of status, less fluctuation than plasma [36]. | More complex processing required to isolate packed cells [36]. | Medium-term (weeks to months) |
| Adipose Tissue | α-Tocopherol (Vitamin E), Fatty Acids [35] [36] | Represents the primary long-term storage depot for lipid-soluble nutrients; excellent for assessing chronic status [36]. | Invasive biopsy procedure required; not suitable for high-frequency monitoring [36]. | Long-term (months to years) |
Troubleshooting Guides and FAQs
Frequently Asked Questions
Q1: Our plasma vitamin E (α-tocopherol) measurements are highly variable between participants. How can we improve the reliability of our status assessment?
A1: Consider complementing plasma analysis with measurements in erythrocytes or adipose tissue. Plasma α-tocopherol is highly dependent on blood lipid concentrations and reflects recent intake. In contrast, erythrocyte α-tocopherol provides a more stable, medium-term measure of status, while adipose tissue α-tocopherol is considered the gold standard for assessing long-term body stores [36]. This multi-specimen approach is particularly crucial for monitoring patients with lipid malabsorption disorders [36].
Q2: We need to validate self-reported vegetarian diet patterns in our cohort. Which biomarkers and specimens are most informative?
A2: A panel of biomarkers across different specimens provides objective validation.
- Plasma: Significantly higher total carotenoids and linoleic acid, and lower saturated fatty acids (e.g., myristic, palmitic) in vegans [35].
- Urine: Markedly higher excretion of isoflavones (from soy/legumes) and enterolactone (a lignin metabolite) in vegetarians [35].
- Urine: 1-Methylhistidine is a highly specific marker for meat intake; levels were 92% lower in vegans compared to non-vegetarians [35].
Q3: What are the critical pre-analytical steps to ensure the integrity of biospecimens for NMR-based metabolomics?
A3: Standardized protocols are essential for reproducible data [38] [37].
- Collection: Use pre-prepared kits with appropriate, non-interfering collection tubes (e.g., correct anticoagulants) [38].
- Processing: Process samples promptly (e.g., within 4 hours for blood to separate plasma/erythrocytes) [36] [37]. Prepare aliquots immediately to avoid repeated freeze-thaw cycles, which can degrade proteins and other labile molecules [38].
- Storage: Store specimens at the coldest feasible temperature (e.g., -80°C or in liquid nitrogen vapor below -150°C) to maximize stability [38].
Troubleshooting Common specimen Handling Issues
Table: Common Specimen Handling Issues and Solutions
| Problem | Potential Cause | Corrective & Preventive Actions |
|---|---|---|
| Hemolyzed blood sample | Difficult venipuncture, rough handling during or after collection [38]. | Use proper venipuncture technique; gentle inversion of tubes; avoid forceful pipetting. Note hemolysis and consider rejecting sample for certain analytes (e.g., NSE) [38]. |
| Degradation of labile biomarkers | Delayed processing; inappropriate storage temperature; multiple freeze-thaw cycles [38]. | Minimize time from collection to processing and freezing. Create multiple single-use aliquots during initial processing to avoid repeated thawing [38]. |
| Inconsistent NMR spectroscopic results | Analytical bias from slight variations in sample prep (pH, temperature) or instrument drift [37]. | Follow a strict, standardized sample preparation protocol. Use a buffer solution. Include internal standards and run quality control (QC) samples periodically throughout the analysis batch [37]. |
| Insufficient sample volume for replication | Inadequate aliquot planning; unforeseen need for additional assays. | Develop a data sharing and aliquot management plan early in the study. Prioritize the use of archived specimens and consider utilizing centralized biorepositories for efficient storage and distribution [39]. |
Detailed Experimental Protocols
This protocol is essential for accurately assessing vitamin E status across different biological compartments.
I. Sample Collection and Pre-processing
- Plasma & RBC: Collect blood in lithium heparin tubes. Process within 4 hours. Centrifuge to separate plasma. Wash red blood cells three times in saline solution with pyrogen (10 g/L). Resuspend to a hematocrit of 50% as "packed cells" [36].
- Adipose Tissue: Obtain ~50-100 mg of subcutaneous adipose tissue via needle biopsy during surgery. Immediately wash with saline, freeze in liquid nitrogen, and store at ≤ -70°C [36].
II. HPLC Analysis for α-Tocopherol
- Extraction: For all matrices, proteins are precipitated with ethanol, and α-tocopherol is extracted into hexane. The hexane layer is evaporated under nitrogen, and the residue is dissolved in methanol/ethanol [36].
- Chromatography:
- System: High-Pressure Liquid Chromatography (HPLC) with UV detection (292 nm).
- Column: Adsorbosphere HS C18 3μm.
- Mobile Phase: Gradient elution starting with methanol-acetonitrile (40/60, v/v) and ending with methanol-acetonitrile-dichloromethane (46/30/24, v/v).
- Internal Standard: Use Tocol to correct for extraction losses [36].
- Quality Control: Assay two levels of internal quality control samples at the start of each run. Participate in external quality-assurance programs [36].
This protocol is used for high-throughput screening and biomarker discovery in nutritional studies.
I. Sample Preparation
- Urine: Centrifuge to remove solid debris. Mix a standardized volume of urine with a phosphate buffer (e.g., 0.2 M Na₂HPO₄, pH 7.4) to minimize pH variation across samples. A known amount of an internal chemical shift standard (e.g., TSP, sodium 3-trimethylsilylpropionate) is added [37].
- Plasma/Serum: Use ~200-300 μL of sample. For lipoprotein profiling, add D₂O for a field-frequency lock [37].
II. NMR Spectroscopy Acquisition
- Standard 1D 'H NMR: Uses a simple pulse-acquisition sequence with water signal suppression. This is the primary method for generating metabolic profiles.
- Relaxation-Edited (CPMG) Sequences: Uses spin-echo pulses to filter out signals from broad macromolecules (proteins, lipoproteins), enhancing the detection of low-molecular-weight metabolites.
- Diffusion-Edited (LED) Sequences: Uses pulsed magnetic field gradients to attenuate signals from small molecules, selectively highlighting signals from macromolecules like lipids and proteins.
- 2D J-Resolved (JRES) Spectroscopy: Spreads the signals in two dimensions, separating chemical shift from spin-spin coupling constants. This simplifies crowded spectra and aids in metabolite identification [37].
Experimental Workflow and Signaling Pathways
Biomarker Research Workflow
Nutrition & Metabolic Pathway
The Scientist's Toolkit: Research Reagent Solutions
Table: Essential Materials and Reagents for Nutritional Biomarker Research
| Item | Function / Application | Key Considerations |
|---|---|---|
| Lithium Heparin Tubes | Blood collection for plasma and RBC separation [36]. | Prevents coagulation; suitable for a wide range of molecular analyses. Check for potential interference with specific assays [38]. |
| Cryogenic Vials | Long-term storage of biospecimens (plasma, RBC, tissue homogenates) [38]. | Use threaded caps for secure sealing at ultra-low temperatures. Select material (e.g., polypropylene) that does not leach compounds and is stable at ≤ -70°C [38]. |
| Tocol | Internal Standard for HPLC analysis of α-tocopherol [36]. | Added at the beginning of extraction to correct for procedural losses, improving analytical accuracy and precision [36]. |
| Deuterated Solvent (D₂O) | Solvent for NMR spectroscopy [37]. | Provides a field-frequency lock for the NMR spectrometer. Required for stable data acquisition [37]. |
| Chemical Shift Standard (e.g., TSP) | Internal reference for NMR spectroscopy [37]. | Used to calibrate the chemical shift axis (δ scale) to 0 ppm, ensuring consistency and comparability of spectra between samples and instruments [37]. |
| Pyrogallol Solution | Preservative for erythrocyte samples [36]. | Added to the saline wash solution to prevent oxidation of labile compounds like vitamin E during RBC processing [36]. |
Pre-analytical variables represent the most significant source of error in nutritional biomarker research, accounting for up to 75% of all laboratory errors [40]. This technical support center provides targeted guidance for standardizing three critical pre-analytical variables—timing, fasting status, and seasonality—within nutritional biomarker measurement protocols. Proper control of these factors is essential for maintaining metabolic integrity and ensuring that analytical profiles accurately reflect the in vivo biochemical status rather than technical artifacts [41].
Reference Tables for Pre-Analytical Variables
Table 1: Impact of Timing and Fasting Status on Specific Biomarkers
| Biomarker Category | Specific Analytes | Fasting Requirement | Circadian Variation | Postprandial Impact |
|---|---|---|---|---|
| Energy Metabolism | Glucose, Triglycerides | Required (10-14 hours) | Significant diurnal patterns | Increases significantly after meals [40] |
| Cardiac Biomarkers | Cardiac Troponins (cTnI, cTnT) | Not required for most assays | Diurnal rhythm with morning peaks [42] | Minimal direct effect [42] |
| Vitamin Status | Fat-soluble vitamins (A, D, E, K) | Recommended | Not well characterized | Lipoprotein changes may affect measurements [2] |
| Nutritional Biomarkers | Plasma Vitamin C, Carotenoids | Required for accurate assessment | Not well documented | Affected by recent fruit/vegetable intake [8] [2] |
| Natriuretic Peptides | BNP, NT-proBNP | Not routinely required | Limited data available | Minimal direct food interference [42] |
Table 2: Seasonal Considerations for Nutritional Biomarkers
| Biomarker | Seasonal Variation | Magnitude/Pattern | Primary Cause |
|---|---|---|---|
| Vitamin D (25-OH-D) | Pronounced variation | Higher in summer months [2] | Sun exposure differences affecting cutaneous synthesis |
| Lycopene | Moderate variation | Varies with harvest seasons [2] | Tomato availability and consumption patterns |
| Other Carotenoids | Possible variation | Depends on food availability | Seasonal changes in fruit/vegetable consumption |
| Inflammatory Markers | Limited data | Inconsistent findings | Potential weather-related activity changes |
Troubleshooting Guides & FAQs
Timing and Circadian Variations
Q: Which nutritional biomarkers exhibit significant circadian variation that must be controlled in research protocols?
A: Circadian rhythms significantly affect several key biomarkers:
- Serum iron can increase by up to 50% from morning to afternoon [40]
- Serum potassium may decline by an average of 1.1 mmol/L from morning to afternoon [40]
- Cardiac troponin T (measured with high-sensitivity assays) demonstrates diurnal rhythm with peak concentrations during morning hours, gradually decreasing throughout daytime [42]
- Hormonal markers including cortisol, renin, aldosterone, and corticotropin show pronounced circadian patterns [40]
Protocol Recommendation: Collect all samples within the same time window (ideally early morning) across the entire study to minimize circadian variability [41]. Document actual collection times meticulously.
Fasting Status Control
Q: What is the optimal fasting duration for nutritional biomarker studies, and how should we manage non-fasting samples?
A: The evidence supports:
- Standard fasting period: 10-14 hours overnight fasting prior to blood collection [40]
- Critical biomarkers requiring fasting: Glucose, triglycerides, and most nutritional biomarkers (e.g., plasma vitamin C, carotenoids) [2] [40]
- Lipemia impact: Inadequate fasting is the most common pre-analytical cause of lipemia, which can interfere with various laboratory methods [42]
Troubleshooting non-fasting samples:
- Document fasting duration accurately for all participants
- For accidentally non-fasted samples, consider using ultracentrifugation or high-speed centrifugation (for cardiac troponins) [42]
- Note that some fat-soluble markers (e.g., carotenoids) in postprandial samples may be partly present in lipoprotein cholesterol, requiring careful interpretation [2]
Seasonal Variation Management
Q: How significant is seasonal variation in nutritional biomarkers, and what strategies can minimize its impact on study validity?
A: Seasonal effects are well-documented for specific biomarkers:
Vitamin D Protocol:
- Consider stratified sampling across seasons for study populations
- For single-timepoint studies, record season of collection as a potential covariate
- In longitudinal studies, collect samples during the same season for each participant at follow-up timepoints
Food-based Biomarker Protocol:
- For biomarkers reflecting specific food intake (e.g., lycopene from tomatoes), document seasonal availability of key foods in food frequency questionnaires
- Consider batch analysis by season to account for potential assay variation
Experimental Protocol for Pre-Analytical Standardization
Sample Collection Workflow
The Scientist's Toolkit: Essential Research Reagents & Materials
Table 3: Key Research Reagent Solutions for Pre-Analytical Standardization
| Item | Specification | Function/Application | Technical Notes |
|---|---|---|---|
| Blood Collection Tubes | Consistent manufacturer and type throughout study | Minimize tube-derived contaminants (polymers, plasticizers, slip agents) [41] | Gel separator tubes not recommended for metabolomics; document anticoagulant type |
| Para-aminobenzoic acid (PABA) | >85% recovery threshold | Assess completeness of 24-hour urine collections [2] | Critical for recovery biomarkers (nitrogen, potassium, sodium) |
| Meta-phosphoric acid | Specific concentration for stabilization | Preserve unstable biomarkers (e.g., vitamin C) during storage [2] | Prevents oxidation of acid-sensitive biomarkers |
| LipoClear or equivalent | Laboratory-grade lipid clearing reagent | Remove lipemia interference from samples [42] | Not suitable for all assays (e.g., cardiac troponins) - verify compatibility |
| Cryogenic Storage Tubes | Pre-labeled, trace-metal free | Proper aliquot storage at -80°C [2] [41] | Prevents repeated freeze-thaw cycles; maintains sample integrity |
| DLW Protocol Materials | Deuterium and oxygen-18 labeled H₂O | Objective energy intake assessment [43] | Considered gold standard for total energy expenditure measurement |
Quality Control & Monitoring Framework
Implement these quality indicators to monitor pre-analytical performance:
- Sample Collection Timing Compliance: Percentage of samples collected within specified time window (target: >95%)
- Fasting Protocol Adherence: Documentation of fasting duration for all participants (target: 100%)
- Seasonal Distribution Balance: Even distribution of sample collection across seasons or appropriate stratification
- Hemolysis Index Tracking: Percentage of samples exceeding acceptable hemolysis thresholds (target: <3%)
- Sample Processing Timeliness: Time from collection to freezing (target: <2 hours for most biomarkers)
Documentation Requirements:
- Actual vs. scheduled collection time differences
- Fasting duration verification
- Participant posture during phlebotomy
- Seasonal timepoint with date of collection
- Any protocol deviations or exceptional circumstances
By implementing these standardized protocols and troubleshooting guides, researchers can significantly reduce pre-analytical variability and enhance the reliability of nutritional biomarker data for drug development and clinical research applications.
Protocols for Sample Processing, Storage, and Avoiding Degradation
Frequently Asked Questions (FAQs)
Q1: What are the most critical factors to prevent RNA degradation during storage? RNA is highly susceptible to degradation by RNases, which are ubiquitous and stable enzymes. The key to prevention involves multiple strategies: using RNase-free reagents and consumables, working in a dedicated clean workspace, and adding RNA stabilization reagents. For long-term integrity, flash-freezing samples in liquid nitrogen immediately after collection and storing them at -70°C or lower in small aliquots is essential to avoid repeated freeze-thaw cycles [44].
Q2: How do sample storage protocols impact the reproducibility of nutritional biomarker research? Inconsistent sample handling and storage are significant sources of variability, which can hinder data pooling and meta-analyses. For example, the BRINDA project identified wide variability in blood collection procedures and sample storage methods as a major barrier to combining data from different nutritional surveys. Detailed, standardized protocols for specimen storage are crucial for ensuring the validity and reproducibility of biomarker data [6].
Q3: What is the "fit-for-purpose" approach in biomarker assay validation? The "fit-for-purpose" approach means that the level of analytical validation for a biomarker assay should be tailored to its specific context of use (COU) in the drug development process. Unlike drug bioanalysis, fixed validation criteria are not always appropriate. The assay's performance characteristics, such as accuracy and precision, are developed based on the specific objectives of the biomarker measurement and the subsequent clinical interpretations [45] [13].
Q4: Why is the choice of storage container important, and what should be considered? The container material can directly affect sample integrity. Glass may crack under extreme temperatures, while certain plastics can absorb analytes or leach contaminants. The container size should match the sample volume to minimize headspace, which can degrade sample quality. Labels must be permanent, waterproof, and use a standardized format for consistent identification [46].
Troubleshooting Common Sample Degradation Issues
Table 1: Common Issues and Corrective Actions in Sample Handling
| Problem | Potential Cause | Corrective & Preventive Actions |
|---|---|---|
| RNA Degradation [44] | RNase contamination; improper storage temperature; repeated freeze-thaw cycles. | Use RNase-deactivating reagents on surfaces; employ single-use, certified RNase-free plasticware; store purified RNA in aliquots at -70°C; always keep samples on ice during processing. |
| Poor Assay Reproducibility [6] [13] | Inconsistent handling or storage across samples; unvalidated assay methods; lack of documented protocols. | Establish and adhere to Standard Operating Procedures (SOPs) for all processing and storage steps; perform analytical method validation based on the context of use; document all protocols in detail. |
| Loss of Biomarker Activity [46] | Exposure to inappropriate temperature, light, or moisture; reactive container materials. | Optimize storage conditions (e.g., -80°C for most biologicals); use opaque or amber containers for light-sensitive samples; ensure containers are chemically inert and tightly sealed. |
| Variable Biomarker Data [47] | Failure to follow sample stabilization requirements; improper pre-processing delays. | Implement immediate sample stabilization after collection (e.g., flash-freezing, chemical stabilizers); minimize the time between collection and stabilization/freezing. |
Detailed Experimental Protocols
Objective: To create a dedicated workspace and adopt practices that minimize RNase contamination for high-quality RNA isolation.
Materials:
- RNase-deactivating reagents (e.g., commercial disinfectants, RNAZap)
- Disposable gloves
- RNase-free pipette tips, microcentrifuge tubes, and plasticware
- Autoclaved glassware (treated with Diethyl Pyrocarbonate (DEPC) if necessary)
- RNase-free water and buffers
Methodology:
- Workspace Decontamination: Before and after experiments, thoroughly clean all work surfaces, pipettors, and equipment with an RNase-deactivating reagent.
- Personal Protective Equipment (PPE): Always wear disposable gloves and change them frequently, especially after touching non-sterile surfaces like door handles or phones.
- Use of Consumables: Opt for single-use, certified RNase-free plasticware. Treat reusable non-disposable plasticware with 0.1 M NaOH/1 mM EDTA, followed by rinsing with RNase-free water.
- Sample Processing: Work quickly to limit RNA exposure to the environment. Keep samples on ice at all times unless using a specific room temperature stabilization reagent.
- Reagents: Use only reagents certified as RNase-free. Prepare small aliquots to avoid repeated freezing and thawing of stock solutions.
Objective: To outline a "fit-for-purpose" process for validating analytical methods used to measure biomarkers, ensuring data reliability for its intended context of use.
Materials:
- Appropriate analytical instrumentation (e.g., LC-MS, ELISA plate reader)
- Quality Control (QC) samples
- Surrogate matrix or surrogate analytes for endogenous biomarkers
Methodology:
- Define Context of Use (COU): Clearly state the purpose of the biomarker measurement (e.g., exploratory research, patient stratification, or surrogate endpoint).
- Select Validation Parameters: Based on the COU, determine which performance characteristics need validation. Key parameters often include:
- Accuracy and Precision: Assess the closeness of the measured value to the true value and the reproducibility of the measurement.
- Lower Limit of Quantification (LLOQ): Determine the lowest concentration that can be reliably measured with acceptable accuracy and precision.
- Parallelism: Demonstrate that the dilution of a sample gives a response parallel to the standard curve, confirming accurate measurement in the biological matrix.
- Execute Validation Plan: Perform experiments to test the selected parameters, often using a surrogate matrix if the biomarker is endogenous.
- Documentation: Comprehensively document all procedures, results, and acceptance criteria met.
Workflow and Pathway Visualizations
Sample Processing Workflow
RNase Contamination Prevention
The Scientist's Toolkit: Research Reagent Solutions
Table 2: Essential Reagents and Materials for Sample Integrity
| Reagent/Material | Function | Example Application |
|---|---|---|
| RNase Inactivation Reagents | Deactivates RNase enzymes on surfaces and equipment. | Creating an RNase-free workspace before RNA extraction [44]. |
| RNA Stabilization Reagents (e.g., RNAprotect) | Immediately stabilizes RNA integrity at room temperature, halting degradation. | Preservation of RNA in collected tissue or cell samples before homogenization [44]. |
| Protease Inhibitor Cocktails | Inhibits a broad spectrum of protease enzymes to prevent protein degradation. | Added to lysis buffers during protein extraction from tissues or cells. |
| EDTA | Chelates divalent cations (e.g., Mg²⁺), which can catalyze RNA hydrolysis. | A component of buffers to chemically stabilize RNA during storage [44]. |
| PAXgene Tubes | Contains reagents that stabilize intracellular RNA in whole blood. | Standardized collection of blood samples for gene expression analysis [44]. |
| Surrogate Matrix | A defined protein solution or buffer used to create standard curves for endogenous biomarkers. | Quantifying biomarkers in serum where the native matrix is complex [45]. |
Navigating Analytical Techniques and Platforms for Different Biomarker Classes
FAQs: Core Concepts and Validation
Q1: What is the critical difference between analytical validation and clinical validation for a biomarker?
A1: Analytical validation and clinical validation serve distinct purposes in the biomarker development pipeline.
- Analytical Validation is the process of "Establishing that the performance characteristics of a test, tool, or instrument are acceptable in terms of its sensitivity, specificity, accuracy, precision, and other relevant performance characteristics using a specified technical protocol." This step ensures the test method itself is technically reliable and reproducible [20].
- Clinical Validation, in contrast, is the process of "Establishing that the test, tool, or instrument acceptably identifies, measures, or predicts the concept of interest." This confirms the biomarker's usefulness for its specific intended purpose, such as diagnosing a disease or predicting treatment response [20].
Q2: How does the intended "Context of Use" influence my choice of analytical platform?
A2: The Context of Use (COU) is a concise description of the biomarker's specified purpose, including its category and how it will inform decisions. The COU is critical because it dictates the required sensitivity, specificity, and reproducibility of the analytical method, which in turn influences platform selection [20].
- For Diagnostic Biomarkers: The platform must provide high specificity and sensitivity to accurately distinguish between disease states, often requiring validation against an accepted diagnostic gold standard [20].
- For Pharmacodynamic/Response Biomarkers: The platform needs to be sensitive enough to detect subtle, often rapid, changes in the biomarker level in response to a therapy, which may favor technologies like mass spectrometry or immunoassays with a wide dynamic range [20] [48].
Q3: What are the most common pitfalls in biomarker data analysis, particularly for omics data?
A3: Mass spectrometry-based proteomics, a common omics approach, presents several analytical challenges [49]:
- Improper Normalization: Failure to use appropriate normalization methods to remove systematic biases can lead to erroneous conclusions about protein abundance.
- Inadequate False Discovery Rate (FDR) Control: In high-throughput experiments, not properly correcting for multiple comparisons increases the risk of falsely identifying proteins as significant.
- Poor Handling of Missing Values: Omics datasets often contain missing values that, if not handled correctly (e.g., through imputation), can bias statistical results and reduce the power of the analysis.
Troubleshooting Guides
Issue 1: Inconsistent Biomarker Measurements Across Laboratories
| Potential Cause | Troubleshooting Steps | Preventive Measures |
|---|---|---|
| Lack of assay standardization [6] | 1. Cross-validate results using a reference method or material.2. Participate in inter-laboratory comparison programs. | - Use standardized, validated protocols from the start.- Clearly document all reagent lots and instrument calibrations. |
| Variable specimen handling [6] | Audit sample collection, processing, and storage logs for inconsistencies. | Implement Standard Operating Procedures (SOPs) for specimen handling, including storage temperature and freeze-thaw cycles [1]. |
| Unaccounted for biological confounders [1] | Statistically adjust for factors like inflammation (using CRP and AGP levels), age, or medication use [6] [1]. | Screen for and record participant-related factors (health status, demographics) during study design [1]. |
Issue 2: High Background Noise or Poor Sensitivity in Immunoassays
| Potential Cause | Troubleshooting Steps | Preventive Measures |
|---|---|---|
| Antibody cross-reactivity [6] | Run selectivity experiments with structurally similar molecules to confirm specificity. | Use well-validated, high-specificity antibody kits and check published validation data [6]. |
| Matrix interference | Dilute the sample and check for parallelism, or use a different sample type/matrix. | Follow kit instructions for recommended sample types and pre-treatment steps. |
| Suboptimal calibration curve | Re-run standards and ensure they cover the expected concentration range of your samples. | Use fresh standard solutions and ensure the assay's Lower Limit of Quantification (LLOQ) is fit for purpose [6]. |
Issue 3: Low Detection Rates for Biomarkers in Nutritional Studies
| Potential Cause | Troubleshooting Steps | Preventive Measures |
|---|---|---|
| Concentration below assay's limit of detection [6] | Concentrate the sample if possible, or switch to a more sensitive technology (e.g., LC-MS/MS) [48]. | Select an analytical platform with a Lower Limit of Quantification (LLOQ) appropriate for the expected physiological range [6]. |
| Inappropriate biomarker for timeframe | Review the biomarker's half-life; use a long-term status biomarker (e.g., from erythrocytes or adipose tissue) instead of a short-term exposure marker [50]. | Align the biomarker class (exposure, status, function) with the study's timeframe and objective [8] [1]. |
| Poor analyte stability [1] | Analyze freshly collected samples to rule out degradation during storage. | Establish and validate protocols for sample collection, processing, and long-term storage [1]. |
Experimental Protocols for Key Techniques
Protocol: Liquid Chromatography with Tandem Mass Spectrometry (LC-MS/MS) for Protein Biomarker Quantification
Methodology: This protocol uses LC-MS/MS for sensitive and specific quantification of target protein biomarkers in plasma, based on described best practices [48] [49].
Sample Preparation:
- Deplete high-abundance proteins (e.g., albumin, IgG) from plasma/serum using immunoaffinity columns.
- Digest proteins into peptides using a sequence-grade protease (e.g., trypsin).
- Desalt and concentrate peptide samples using C18 solid-phase extraction tips.
Liquid Chromatography (LC):
- Separate peptides using a reverse-phase C18 column with a nano-flow or ultra-high-performance liquid chromatography (UHPLC) system.
- Employ a gradient elution from 2% to 35% mobile phase B (0.1% formic acid in acetonitrile) over 60-120 minutes.
Mass Spectrometry (MS) Analysis:
- Operate the mass spectrometer in positive ion mode and data-dependent acquisition (DDA) or targeted mode (e.g., Multiple Reaction Monitoring - MRM).
- For MRM, define specific precursor-product ion transitions for each target peptide.
- Use a stable isotope-labeled version of each target peptide as an internal standard for precise quantification.
Data Analysis:
- Process raw data using software (e.g., Skyline, MaxQuant) to integrate chromatographic peaks [49].
- Normalize peptide abundances using internal standards.
- Perform statistical analysis to compare biomarker levels across sample groups.
Protocol: Validating a Biomarker for Differential Diagnosis
Methodology: This protocol outlines the clinical validation of a biomarker intended for differential diagnosis, as required by regulatory frameworks [20].
Define Cohort:
- Recruit a well-characterized cohort that includes patients with the target disease and relevant differential diagnoses (control groups).
- Ensure sample size provides sufficient statistical power.
Blinded Sample Analysis:
- Analyze biomarker levels in all samples using the analytically validated platform.
- Keep the diagnostician and laboratory personnel blinded to the clinical diagnoses.
Assess Diagnostic Accuracy:
- Compare biomarker results against the accepted clinical gold-standard diagnosis.
- Calculate performance metrics: sensitivity, specificity, positive/negative predictive values, and area under the Receiver Operating Characteristic (ROC) curve.
Statistical and Regulatory Reporting:
- Document the Context of Use and all analytical performance characteristics.
- Report findings according to relevant guidelines (e.g., FDA, EMA) [48].
Essential Diagrams
Biomarker Development Workflow
Biomarker Category Selection Guide
The Scientist's Toolkit: Research Reagent Solutions
| Item | Function | Example Application |
|---|---|---|
| Stable Isotope-Labeled Internal Standards | Allows for precise, absolute quantification by correcting for sample loss and ion suppression during MS analysis. | Quantification of peptide biomarkers in plasma via LC-MS/MS [49]. |
| High-Specificity Antibodies | Used in immunoassays (ELISA) to specifically capture and detect the target biomarker of interest. | Measuring inflammatory markers like CRP and AGP in nutritional studies [6]. |
| Immunoaffinity Depletion Columns | Remove highly abundant proteins (e.g., albumin) from biological fluids to enhance detection of lower-abundance biomarkers. | Sample pre-fractionation for plasma proteomics to deepen coverage [49]. |
| Quality Control (QC) Pools | A pooled sample from the study cohort analyzed repeatedly to monitor assay precision and stability over time. | Inter-batch QC for longitudinal biomarker studies to ensure data consistency [6]. |
| Standard Reference Materials (SRMs) | Well-characterized materials with certified analyte concentrations used to calibrate instruments and validate methods. | Assay standardization and cross-platform calibration to improve reproducibility [6]. |
Technical Support Center
Troubleshooting Guide
Table 1: Common Analytical Issues and Solutions for Lipid-Soluble Vitamin Assessment
| Problem Area | Specific Issue | Possible Causes | Recommended Solutions |
|---|---|---|---|
| Pre-Analytical Variables | Inconsistent serum 25(OH)D results between studies | Different analytic methodologies and lack of standardization [51] | Apply Vitamin D Standardization Program (VDSP) protocols to existing data and future measurements [51] [52] |
| Degradation of vitamin biomarkers during storage | Improper storage temperature, light exposure, repeated freeze-thaw cycles [2] | Store samples at -80°C in multiple aliquots; protect light-sensitive vitamins (e.g., K, riboflavin) [2] | |
| Confounding interpretation of fat-soluble antioxidant concentrations | Variation in blood lipid levels between individuals [53] | Use lipid standardization: adjust concentrations for VLDL, HDL, and LDL cholesterol [53] | |
| Analytical Performance | Poor recovery of lipid-soluble vitamins in aqueous solutions | Hydrophobic nature of the molecules [54] | Use solubilization agents like Glucosyl-β-cyclodextrin to form inclusion complexes [55] |
| Between-assay variability in 25(OH)D measurement | Assays not calibrated to reference measurement procedures [52] | Participate in accuracy-based performance testing (e.g., DEQAS, CAP) and use Standard Reference Materials [52] | |
| Failure to meet performance criteria | High coefficient of variation (CV) and bias [52] | Target performance of CV ≤ 10% and Bias ≤ 5% for routine laboratories [52] | |
| Biological Interpretation | Weak antioxidant activity observed for β-carotene | Methodological limitations of chemical assessment methods [56] | Use biological tests (e.g., resistance of RBC to AAPH-induced hemolysis) instead of only chemical methods [56] |
| Biomarker level does not reflect habitual intake | Use of short-term reflection specimens (e.g., serum) [2] | Use specimens reflecting longer-term intake (e.g., erythrocytes, adipose tissue) for chronic exposure assessment [2] |
Frequently Asked Questions (FAQs)
Q1: Why is standardization of lipid-soluble vitamin measurements so important, particularly for vitamin D?
Standardization is crucial because method-related differences in 25(OH)D assays have confounded international efforts to develop evidence-based guidelines. Without standardization, it is impossible to accurately compare results from different studies, determine true prevalence of deficiency, or establish reliable clinical cut-off points. The Vitamin D Standardization Program (VDSP) was established specifically to promote 25(OH)D measurements that are accurate and comparable over time, location, and laboratory procedure to improve clinical and public health practice worldwide [51] [52].
Q2: What are the key performance targets my laboratory should aim for when measuring 25-hydroxyvitamin D?
The VDSP advocates the following performance limits for routine laboratories measuring total 25-hydroxyvitamin D:
- Coefficient of Variation (CV): ≤ 10%
- Bias: ≤ 5% Reference laboratories should strive for even stricter standards (CV ≤ 5%, Bias ≤ 1.7%) [52].
Q3: How do blood lipid levels affect the interpretation of fat-soluble vitamin concentrations, and how should this be addressed?
Blood lipids significantly influence fat-soluble antioxidant concentrations and can confound their interpretation as indicators of intake status and disease risk. Research shows that tocopherols and carotenoids are associated with plasma total cholesterol and its components (LDL, HDL, and VLDL). It is recommended to simultaneously adjust concentrations of tocopherols, zeaxanthin plus lutein, and lycopene for VLDL, HDL, and LDL cholesterol. This lipid standardization method provides a more reliable basis for comparing carotenoid and tocopherol concentrations between individuals [53].
Q4: What biological specimens are most appropriate for assessing different aspects of lipid-soluble vitamin status?
The choice of specimen depends on whether you need short-term or long-term exposure assessment:
- Serum/Plasma: Reflects short-term intake (days to weeks) [2]
- Erythrocytes: Reflect longer-term intake than serum (half-life ~120 days) [2]
- Adipose Tissue: Ideal for long-term assessment of fat-soluble vitamins [2]
- 24-hour Urine: Suitable for recovery biomarkers but burdensome for participants [2]
Q5: What practical steps can I take to improve the stability and solubility of lipid-soluble vitamins in experimental settings?
Complexation with cyclodextrins, particularly Glucosyl-β-cyclodextrin (G-β-CD), has been shown to effectively solubilize lipid-soluble vitamins in aqueous solution. The stoichiometric ratios for complex formation vary by vitamin: 1:2 for vitamin A alcohol/G-β-CD, 1:1 for vitamin D3/G-β-CD, 1:3 for vitamin E/G-β-CD, and 1:3 for vitamins K1 and K2/G-β-CD. These complexes also enhance stability - for example, vitamin E nicotinate-G-β-CD complex solution remains stable even under irradiation with light [55].
Experimental Protocols & Workflows
Standardized Protocol for Retrospective Standardization of Serum 25(OH)D Data
Based on the VDSP approach applied to the Irish National Adult Nutrition Survey [51]:
Re-analysis of Sample Subset: Select a representative subset of stored serum samples (approximately 100 samples works well) for reanalysis using a standardized LC-tandem MS method.
Regression Equation Development: Develop a regression equation between the original values (e.g., from ELISA) and the standardized LC-tandem MS values from the subset.
Project Standardized Values: Use this equation to predict standardized values for all samples in the original dataset.
Validation: Compare prevalence estimates at critical thresholds (e.g., <30, <40, <50 nmol/L) between original, projected, and fully reanalyzed data to validate the approach.
Workflow for Lipid Standardization of Fat-Soluble Antioxidants
Adapted from the YALTA study methodology [53]:
Measure antioxidant concentrations (tocopherols, carotenoids) in serum samples.
Quantify major lipoprotein fractions:
- LDL Cholesterol
- HDL Cholesterol
- VLDL Cholesterol (estimated as plasma total triacylglycerols/5)
Perform simultaneous adjustment of antioxidant concentrations for all three lipoprotein fractions using multivariate regression.
Use adjusted values for all between-individual comparisons to eliminate confounding by lipid levels.
The Scientist's Toolkit
Table 2: Essential Research Reagent Solutions for Lipid-Soluble Vitamin Analysis
| Reagent/Category | Specific Examples | Function/Application |
|---|---|---|
| Solubilization Agents | Glucosyl-β-cyclodextrin (G-β-CD) [55] | Forms inclusion complexes with lipid-soluble vitamins, enhancing their water solubility and stability in aqueous solutions. |
| Reference Materials | NIST Standard Reference Materials (SRM 972a, SRM 2972) [52] | Provides certified reference materials with assigned values for calibrating 25(OH)D assays and verifying accuracy. |
| Quality Control Materials | Vitamin D External Quality Assessment Scheme (DEQAS) materials [52] | Commutable materials for accuracy-based performance testing and external quality assessment. |
| Binding Proteins | Cellular Retinol-Binding Protein (CRBP-I, CRBP-II), Cellular Retinoic Acid-Binding Protein (CRABP-I, CRABP-II) [54] | Intracellular transporters for retinol and retinoic acid; important for understanding vitamin A metabolism and function. |
| Stabilization Reagents | Meta-phosphoric acid [2] | Stabilizes oxidation-prone vitamins like vitamin C during storage; similar principles apply to light-sensitive vitamins. |
Visual Workflows
Lipid-Soluble Vitamin Assessment Pathway
Biomarker-Lipid Relationship
Troubleshooting Biomarker Measurement: Identifying and Mitigating Confounding Factors
Within the critical endeavor of standardizing nutritional biomarker measurement protocols, managing pre-analytical variables is paramount. Among these, sample hemolysis represents the most frequent source of error, potentially leading to inaccurate measurements, misinterpretation of nutritional status, and reduced reproducibility of research findings [57] [58]. This technical support guide provides researchers and scientists with targeted troubleshooting guides and FAQs to identify, manage, and mitigate the effects of hemolysis and related interferences, thereby enhancing the reliability of nutritional biomarker data.
Understanding Hemolysis: Mechanisms and Causes
What is Hemolysis and Why is it a Problem?
Hemolysis is defined as the breakdown of red blood cells (RBCs) and the subsequent release of their intracellular components into the serum or plasma [59]. It is the leading pre-analytical interferent, accounting for nearly 60% of all rejected samples in clinical laboratories [57]. This process can occur in vivo (due to physiological conditions) or, more commonly, in vitro (due to improper sample handling) [57] [59].
The interference mechanisms are multifaceted and include:
- Increase in Analyte Concentration: Release of intracellular components that are at higher concentration inside RBCs than in plasma (e.g., potassium, lactate dehydrogenase (LD), aspartate aminotransferase (AST)) [57] [59].
- Chemical Interference: Hemoglobin or other erythrocytic constituents chemically interacting with assay reagents (e.g., interference in bilirubin measurement) [57] [59].
- Spectrophotometric Interference: The strong absorbance peaks of hemoglobin (e.g., at 415 nm, 540 nm) can overlap with the detection wavelengths of many assays, causing false elevations or reductions [57] [59].
- Dilutional Effect: Leakage of intracellular fluid can dilute analytes that are present at lower concentrations inside RBCs, such as sodium and glucose [59].
How Can I Differentiate Between In Vivo and In Vitro Hemolysis?
Differentiating the type of hemolysis is crucial for correct data interpretation. The table below outlines the key characteristics.
Table 1: Differentiating In Vivo from In Vitro Hemolysis
| Feature | In Vivo Hemolysis | In Vitro Hemolysis |
|---|---|---|
| Prevalence | Rare (~3% of hemolyzed samples) [57] | Very common [57] |
| Primary Cause | Pathophysiological conditions (e.g., hemolytic anemias, infections, mechanical heart valves) [59] | Improper blood collection or sample handling [58] [59] |
| Associated Clinical Signs | Often present (e.g., anemia, increased bone marrow activity) [59] | Absent |
| Sample-Specificity | Affects all samples from the same patient drawn simultaneously [59] | Can affect individual samples inconsistently |
| Management | Report with a comment on potential interference; consider clinical context [59] | Implement corrective pre-analytical actions; reject severely hemolyzed samples [60] |
Troubleshooting Guides & FAQs
Frequently Asked Questions (FAQs)
Q1: What are the most common causes of in vitro hemolysis during blood sampling? A1: The primary causes are often operator- or device-dependent [58] [59]:
- Blood Draw Technique: Using too narrow a needle, difficult or prolonged venipuncture, forceful transfer of blood from a syringe, and prolonged tourniquet application.
- Sample Handling: Inadequate mixing of tubes, excessive shaking, exposure to extreme temperatures, and delayed processing.
- Transport: Use of high-velocity pneumatic tube systems (PTS) without cushioning inserts [58].
Q2: How is hemolysis detected and measured in the laboratory? A2: While visual inspection is possible (red-colored plasma/serum), it is subjective and not recommended for standardization [57] [59]. The preferred method is the quantitative determination of cell-free hemoglobin concentration, often reported as a hemolysis index (H-index) [60] [59]. Modern clinical chemistry analyzers automatically measure this index using spectrophotometry, providing an objective and reproducible value to guide decision-making [59].
Q3: My sample is hemolyzed. Should I always discard it and recollect? A3: Not necessarily. The decision can be customized for each analyte based on the hemolysis level [60] [59]. A three-level approach is recommended:
- Accept: If hemolysis is below a threshold where bias is less than the allowable analytical variability, report results.
- Correct & Comment: If hemolysis causes a bias that exceeds analytical but not biological variability, report results with a comment or use a corrective formula.
- Reject: If hemolysis is severe and bias exceeds clinical acceptability, reject the sample and request a new one [60].
Decision-Making Workflow for Hemolyzed Samples
The following diagram illustrates a systematic workflow for handling a hemolyzed sample, from detection to final reporting.
Quantitative Interference Data for Nutritional Biomarkers
The effect of hemolysis is analyte-specific. The following tables summarize the threshold levels of hemolysis (as cell-free hemoglobin in g/L) that cause analytically and clinically significant bias for key biomarkers, based on controlled interference experiments.
Table 2: Hemolysis Interference Thresholds for Energy and Protein Metabolism Biomarkers
| Biomarker | Analytical Threshold (g/L) | Clinical Threshold (g/L) | Effect of Hemolysis |
|---|---|---|---|
| Glucose (GLU) | 0.38 | 3.90 | Decrease (Dilution/Premature decomposition) [60] |
| NEFA | 0.39 | 3.31 | Not Specified [60] |
| BHB | 0.96 | 4.81 | Not Specified [60] |
| Urea | 6.62 | 20.1 | Minimal effect up to 4.5 g/L [57] [60] |
| Total Protein (TPROT) | 1.40 | 6.80 | Minimal effect up to 4.5 g/L [57] [60] |
| Albumin (ALB) | 1.12 | 6.11 | Minimal effect up to 4.5 g/L [57] [60] |
| Uric Acid | Not Specified | Not Specified | Slight Decrease [57] |
Table 3: Hemolysis Interference Thresholds for Hepatic, Mineral, and Hormonal Biomarkers
| Biomarker | Analytical Threshold (g/L) | Clinical Threshold (g/L) | Effect of Hemolysis |
|---|---|---|---|
| Lactate Dehydrogenase (LD) | 0.01 | 0.11 | Strong Increase (Intracellular release) [57] [60] |
| Aspartate Aminotransferase (AST) | 0.11 | 2.18 | Strong Increase (Intracellular release) [57] [60] |
| Total Bilirubin (TBIL) | 0.75 | 5.65 | Decrease (Chemical interference) [57] [60] |
| Potassium (K) | Not Specified | Not Specified | Strong Increase (~1.4 fold at 4.5 g/L) [57] |
| Inorganic Phosphate (P) | 0.57 | 8.43 | Significant Increase (Intracellular release) [57] [60] |
| Iron (Fe) | Not Specified | Not Specified | Minimal effect up to 4.5 g/L [57] |
| Insulin (INS) | 1.15 | 3.89 | Not Specified [60] |
| Cortisol (CORT) | 2.78 | 11.22 | Not Specified [60] |
Standardized Experimental Protocols
Protocol for In Vitro Hemolysis Interference Studies
To validate the impact of hemolysis on a specific assay, a controlled interference experiment can be performed. Below is a generalized protocol adapted from research methodologies [57] [60].
Aim: To determine the relationship between the degree of in vitro hemolysis and the bias in the measurement of target analytes.
Materials:
- Blood Collection Tubes: Heparinized tubes (e.g., Vacuette ) [57].
- Equipment: Centrifuge, spectrophotometer, clinical chemistry analyzer.
- Reagents: Na₂CO₃ solution for free hemoglobin measurement [57].
Procedure:
- Sample Collection: Draw venous blood from healthy volunteers into multiple anticoagulant tubes.
- Generation of Hemolysis: Create a series of hemolyzed samples with varying degrees of hemolysis. The mechanical trauma method is commonly used:
- For each donor, use multiple tubes.
- Subject the samples to different levels of mechanical stress (e.g., swiftly drawing blood through a syringe needle 2, 4, 6, and 8 times) to lyse cells [57].
- Sample Preparation: Centrifuge all tubes at 1000 x g for 15 minutes to obtain clear plasma [57].
- Hemolysis Quantification:
- Measure the cell-free hemoglobin concentration in each sample spectrophotometrically.
- Use absorbance readings at 415 nm, 450 nm, and 700 nm.
- Calculate concentration using a validated formula (e.g., Hb = 154.7 × (A425) – 130.7 × (A450) – 123.9 × (A700)) [57].
- Sample Grouping: Pool and categorize samples into groups based on their free hemoglobin concentration (e.g., Non-hemolyzed: <0.1 g/L; Slight: 0.1-0.5 g/L; Mild: 0.51-1.00 g/L; Moderate: 1.01-2.50 g/L; Severe: 2.51-4.5 g/L) [57].
- Analyte Measurement: Analyze the target biomarkers in all sample groups using your standard clinical chemistry analyzer (e.g., Olympus AU2700) [57].
- Data Analysis:
- Calculate the percentage bias for each analyte at each hemolysis level: Bias % = [(Cₕ - Cₙₕ) / Cₙₕ)] × 100, where Cₕ is the concentration in the hemolyzed sample and Cₙₕ is the concentration in the non-hemolyzed sample [57].
- Compare the bias against acceptable performance limits (e.g., CLIA'88 criteria or biological variation-based goals) to establish interference thresholds [57] [60].
The Scientist's Toolkit: Key Research Reagent Solutions
Table 4: Essential Materials for Hemolysis Interference Studies
| Item | Function / Application | Example / Specification |
|---|---|---|
| Heparinized Blood Tubes | Prevents coagulation while allowing plasma separation for analysis. | Vacuette (Greiner Labortechnik) [57] |
| Clinical Chemistry Analyzer | High-throughput, precise measurement of a wide range of biochemical analytes. | Olympus AU2700 System [57] |
| Spectrophotometer | Quantification of cell-free hemoglobin concentration for hemolysis indexing. | Shimadzu Corporation [57] |
| Hemolysis Calculation Reagent | Used in the spectrophotometric measurement of free hemoglobin. | Na₂CO₃ solution (10 mg/100 mL) [57] |
| Heterophilic Antibody Blocking Agents | Added to assay reagents to reduce risk of antibody-based interferences in immunoassays. | Non-specific immunoglobulin [61] |
Broader Context: Stability and Other Analytical Interferences
Beyond hemolysis, other confounders threaten biomarker integrity.
Sample Stability: The stability of many biomarkers is time- and temperature-sensitive. For instance, neuron-specific enolase (NSE) concentrations are affected by both hemolysis and storage conditions, with recommendations to store samples at -80°C for no more than 6-9 months [62]. Each biomarker requires validation of its stability under specific storage conditions.
Other Analytical Interferences:
- Lipemia: Turbidity from high lipid content can cause light scattering and spectrophotometric interference.
- Icterus: High bilirubin can absorb light and interfere chemically in certain assays.
- Heterophilic Antibodies: Endogenous antibodies (e.g., human anti-mouse antibodies) can bind assay reagents, leading to false elevations or suppressions, particularly in immunoassays for hormones (e.g., insulin) or cardiac troponins [61]. Modern assays use blocking agents and chimeric antibodies to mitigate this [61].
Within the framework of standardizing nutritional biomarker research, a rigorous and proactive approach to managing sample hemolysis is non-negotiable. By implementing the troubleshooting guides, interference thresholds, and standardized protocols outlined in this document, researchers can significantly reduce pre-analytical error. This enhances data quality, ensures the validity of research conclusions, and ultimately strengthens the scientific foundation of nutritional science and personalized health.
Frequently Asked Questions (FAQs)
FAQ 1: Why is the timing of blood collection critical for nutritional biomarker assessment? The timing of blood collection is paramount due to diurnal rhythms inherent to many biomarkers. Concentrations of various nutrients and metabolites fluctuate predictably throughout the 24-hour day. For example, a case study on 25-hydroxyvitamin D [25(OH)D] demonstrated a statistically significant daily pattern, with peak midday levels approximately 20% higher than morning levels [63]. Collecting samples at inconsistent times introduces systematic error that can be larger than the analytical error of the assay itself, compromising data integrity and cross-study comparisons [63].
FAQ 2: How does illness impact the interpretation of nutritional biomarkers? Acute illness triggers an acute-phase response, a systemic inflammatory reaction that can profoundly alter the concentration of many nutritional biomarkers independently of true nutritional status. This response can include a decrease in circulating concentrations of certain nutrients, as was incidentally found in the 25(OH)D case study, where the onset of a cold was associated with acutely lower levels at every sampling time [63]. This is part of a physiological redistribution and should not be misinterpreted as a sudden deficiency [64] [1]. It is crucial to record the health status of participants and, where applicable, measure inflammatory markers like C-reactive protein (CRP) to enable appropriate statistical adjustment [1].
FAQ 3: What constitutes a meaningful change in a biomarker value for an individual over time? Wide inter-individual variability exists in many biomarkers, making population-based reference ranges of limited value for monitoring individuals [65]. A meaningful change is best identified using statistical methods for longitudinal data that generate individualized thresholds [65]. Factors to consider include the within-person biological variability (e.g., diurnal rhythm, day-to-day fluctuation) and the analytical imprecision of the assay. For instance, if a biomarker's within-day variability is 20%, a change smaller than this could be due to normal biological rhythm rather than a intervention effect [63] [66].
FAQ 4: How can I select the most appropriate biomarker for a nutrition study? Biomarkers should be selected based on the specific research question and can be classified into three groups [1]:
- Biomarkers of Exposure: Objective measures of nutrient intake (e.g., urinary nitrogen for protein intake).
- Biomarkers of Status: Measure the concentration of a nutrient in biological fluids or tissues (e.g., serum ferritin for iron stores).
- Biomarkers of Function: Assess the functional consequences of nutrient status, such as the activity of a nutrient-dependent enzyme (e.g., glutathione peroxidase for selenium status). These often have greater biological significance.
Troubleshooting Guides
Issue: Inconsistent Biomarker Values Without Clear Cause
| Potential Cause | Diagnostic Steps | Corrective Action |
|---|---|---|
| Uncontrolled Diurnal Variation | Review sample collection logs for consistency in time of day. | Implement a standardized phlebotomy window for all participants (e.g., 7:00-9:00 AM) [1]. |
| Subclinical Inflammation | Measure acute-phase proteins (e.g., CRP, AGP). | Use statistical methods (e.g., BRINDA) to adjust biomarker values for inflammation [1]. |
| Improper Sample Handling | Audit procedures for sample processing, transport, and storage. | Establish and rigorously follow standardized protocols for sample collection and handling to ensure pre-analytical quality [65]. |
| High Within-Person Variability | Conduct a pilot study with repeated measures from the same individual. | Increase the number of replicate measurements per subject to better estimate the true baseline [67]. |
Issue: Biomarker Data Shows No Association with Dietary Intervention
| Potential Cause | Diagnostic Steps | Corrective Action |
|---|---|---|
| Measurement Error in Biomarker | Review assay quality control data for precision (Coefficient of Variation). | Use methods that account for measurement error in statistical analysis, or choose biomarkers/methods with lower analytical variability [66]. |
| Insufficient Intervention Duration | Check the known half-life and turnover rate for the biomarker. | Ensure the intervention period is long enough for the biomarker to reach a new steady-state [63]. |
| Non-Fasting State | Confirm participant fasting status prior to blood draws. | Enforce a standardized fasting protocol (e.g., 10-12 hour overnight fast) for all participants [65] [1]. |
| Nutrient Interactions | Review the full supplement composition or dietary intervention. | Account for known interactions in study design and statistical analysis (e.g., zinc and copper) [1]. |
Table 1: Magnitude of Diurnal Variation in Selected Biomarkers
| Biomarker | Biological Matrix | Peak-to-Trough Amplitude | Time of Peak Concentration | Key Reference |
|---|---|---|---|---|
| 25-Hydroxyvitamin D [25(OH)D] | Dried Blood Spot | ~20% (midday vs. morning) | Midday | [63] |
| Interleukin-6 (IL-6) | Plasma/Serum | Can vary significantly | Inflammatory marker; rhythm can be altered by disease | [64] |
Table 2: Impact of Acute-Phase Response on Nutritional Biomarkers
| Biomarker | Direction of Change during Inflammation | Interpretation & Consideration |
|---|---|---|
| Iron / Ferritin | Decreased (Fe); Increased (Ferritin) | Redistribution; ferritin is a positive acute-phase reactant. |
| Zinc | Decreased | Redistribution to liver; not a reliable indicator of status during illness. |
| Retinol | Decreased | Complex redistribution; assessment confounded by inflammation. |
| 25(OH)D | Decreased (as reported in case study) | May be lowered during acute illness [63]. |
Experimental Protocols
Detailed Protocol: Assessing Diurnal Rhythm of a Nutritional Biomarker
Objective: To characterize the within-day biological variability of a specific nutritional biomarker.
Methodology:
- Participant Preparation: Participants maintain a consistent sleep-wake cycle (e.g., 11:00 PM - 7:00 AM) and dietary intake for at least three days prior to and during the sampling day. The intake of supplements should be recorded and/or controlled.
- Sample Collection: On the sampling day, multiple blood samples are collected at predetermined intervals. The case study on 25(OH)D used a model of five independent samples per time point to account for analytical variability [63].
- Recommended Time Points: Morning (e.g., 8:00 AM), Midday (e.g., 12:00 PM), Evening (e.g., 8:00 PM).
- Standardization: All samples should be collected using identical procedures regarding posture, tourniquet time, and processing (e.g., centrifugation, aliquoting, freezing).
- Data Analysis: Perform a one-way analysis of variance (ANOVA) to test for significant fluctuation across the time points. Post-hoc tests with Bonferroni correction can identify which specific time points differ significantly [63].
Detailed Protocol: Controlling for the Acute-Phase Response
Objective: To distinguish true nutritional deficiency from inflammation-induced changes in biomarker concentration.
Methodology:
- Co-measurement of Inflammatory Markers: In every sample collected for nutritional assessment, simultaneously measure validated markers of inflammation.
- Primary Markers: High-sensitivity C-reactive Protein (CRP) and Alpha-1-Acid Glycoprotein (AGP) [1].
- Categorization of Inflammation: Classify participants into inflammation states based on established cut-offs for CRP and AGP.
- Statistical Adjustment: Apply correction factors to the nutritional biomarker data to account for the effect of inflammation. The Biomarker Reflecting Inflammation and Nutritional Determinants of Anemia (BRINDA) project provides robust regression correction methods for this purpose [1].
The Scientist's Toolkit: Research Reagent Solutions
Table 3: Essential Materials for Nutritional Biomarker Research
| Item / Reagent | Function & Application in Research | Key Consideration |
|---|---|---|
| High-Sensitivity CRP & AGP Assays | Quantify low-grade inflammation to adjust nutritional biomarkers. | Essential for interpreting micronutrient status in field studies [1]. |
| Stable Isotope Tracers | Directly measure whole-body protein metabolism and nutrient utilization. | Considered a robust but complex and costly method for metabolic studies [64]. |
| Liquid Chromatography-Tandem Mass Spectrometry (LC-MS/MS) | Gold-standard method for precise quantification of specific biomarkers (e.g., 25(OH)D). | Provides high specificity and sensitivity; used for validating other methods [63]. |
| Standardized Blood Collection Tubes & Kits | Ensure pre-analytical consistency for biomarkers sensitive to processing (e.g., trace metals). | Minimizes contamination and variability introduced during sample collection [65]. |
| Enzyme Activity Assays | Functional biomarker for nutrients that are enzyme cofactors (e.g., Selenium, Glutathione Peroxidase). | Measures the physiological consequence of nutrient status [1]. |
Troubleshooting Guide: Frequently Asked Questions
Q1: How can I non-invasively monitor inflammation in participants to reduce burden and improve adherence?
Non-invasive methods for monitoring inflammatory biomarkers, particularly C-Reactive Protein (CRP), are viable alternatives to traditional blood draws. Research confirms that urine and saliva samples show strong correlation with serum CRP levels.
Table: Performance of Non-Invasive CRP Measurement Methods [68]
| Sample Type | Correlation with Serum CRP | Statistical Significance (P-value) | Key Advantage |
|---|---|---|---|
| Urine | rsp = 0.886 | P < .001 | Strongest correlation; high patient preference |
| Saliva | rsp = 0.709 | P < .001 | Good correlation; easy collection |
| Multimodal (Urine + Saliva) | 76.1% of serum CRP variance predicted | Outperforms single-modality models | Enhanced predictive power |
Experimental Protocol for Non-Invasive CRP Sampling [68]:
- Saliva Collection: Use an absorbent swab (e.g., Salimetrics SalivaBio Oral Swab). Place it under the participant's tongue for 3 minutes, then transfer directly to a collection tube.
- Urine Collection: Collect a midstream urine sample. Perform a dipstick test (e.g., Roche Combur Test Strip) immediately to screen for urinary tract infections, which can confound systemic inflammation results.
- Pre-Sampling Instructions: Participants should fast for at least 2 hours, avoiding all liquids except water. They should not use chewing gum, brush teeth, use mouthwash, or smoke prior to sampling.
Q2: What are the key considerations for accounting for participant supplement intake in nutritional biomarker studies?
Dietary supplement (DS) intake is a major confounder due to widespread quality issues and variable composition. Accurate assessment is critical for interpreting nutritional biomarker data.
Key Challenges in Accounting for Supplement Intake [69] [70] [71]:
- Label Inaccuracy: Supplement contents often do not match label claims, with issues including absent listed ingredients, undisclosed contaminants, or unlisted pharmaceutical drugs.
- Analytical Complexity: Validated analytical methods and reference materials for many complex botanical supplements are often unavailable.
- Global Variability: Regulatory definitions of "dietary supplements" vary internationally, leading to inconsistent product composition and quality.
Table: Research Reagent Solutions for Supplement Analysis [69] [70]
| Resource / Reagent | Function | Application in Research |
|---|---|---|
| Certified Reference Materials (CRMs) | Provides an analytically verified standard for comparison. | Essential for validating lab results and ensuring measurement accuracy of supplement content. |
| Validated Analytical Methods | Standardized protocols for quantifying specific ingredients. | Enables reproducible measurement of nutrient and bioactive compound levels in supplements. |
| Dietary Supplement Ingredient Database (DSID) | Public database of analytically derived supplement content. | Provides realistic estimates of ingredient levels for calculating participant exposure and intake. |
| Dietary Supplement Label Database (DSLD) | Searchable database of supplement labels. | Allows researchers to verify declared ingredients and product-specific information. |
Experimental Protocol for Characterizing Supplement Intake [69] [71]:
- Product Verification: For intervention studies, retain samples from the exact product and lot number administered to participants.
- Compound Identification: Use targeted analytical techniques (e.g., LC-MS/MS) to identify and quantify known active compounds or marker compounds.
- Non-Targeted Analysis: For complex botanicals, employ non-targeted approaches (e.g., metabolomics) to characterize the full chemical profile.
- Contaminant Screening: Test for common adulterants, heavy metals, pesticides, and microbial contaminants that could affect biomarker levels or participant safety.
Q3: How do medications interfere with inflammatory and nutritional biomarkers, and how can this be mitigated?
Medications can directly or indirectly alter biomarker levels, creating confounding effects. A proactive, systematic approach to documentation and analysis is necessary.
Common Mechanisms of Interference: Medications can affect biomarker levels by altering metabolic pathways, causing organ-specific impacts (e.g., hepatotoxicity), or creating cross-reactivity in immunoassays.
Experimental Protocol for Mitigating Medication Interference:
- Comprehensive Documentation: Record the generic name, dosage, frequency, and indication for all prescription and over-the-counter medications. The DID-METAB Checklist provides a framework for detailed reporting of such factors [72].
- Stratified Analysis: Plan to stratify data analysis by medication use (e.g., statins, metformin, anti-inflammatories) to identify potential confounding subgroups.
- Statistical Adjustment: Use medication status as a covariate in statistical models to control for its effects on the primary biomarker outcomes.
- Consult Preclinical Data: Review literature on the pharmacokinetics and pharmacodynamics of common medications to anticipate potential interactions with the biomarkers of interest. The integration of AI and multi-omics is a growing trend for predicting these interactions [73].
Q4: What emerging technologies and approaches can improve the assessment of these participant-related factors?
The field is rapidly evolving with new technologies that offer more precise, comprehensive, and objective measurements.
Table: Emerging Trends in Biomarker Assessment [73] [74]
| Technology / Approach | Application | Benefit |
|---|---|---|
| Multi-Omics Integration | Combining data from genomics, proteomics, and metabolomics. | Provides a holistic view of biological responses to diet, supplements, and inflammation, enabling discovery of novel biomarker signatures [73]. |
| Artificial Intelligence (AI) & Machine Learning | Analyzing complex datasets for pattern recognition and prediction. | Improves predictive models for disease progression and treatment response; automates data interpretation [73]. |
| Novel Inflammation Biomarkers (e.g., EKODEs) | Detecting oxidative stress compounds bound to proteins in specific tissues [74]. | Potential for future blood tests to pinpoint inflammation in specific organs (e.g., brain, heart), moving beyond systemic markers like CRP [74]. |
| Enhanced Liquid Biopsies | Analyzing circulating biomarkers from blood or other biofluids. | Enables real-time monitoring of disease progression and treatment response with minimal invasiveness [73]. |
| Single-Cell Analysis | Examining individual cells within tissues or biofluids. | Uncovers cellular heterogeneity and identifies rare cell populations that drive disease, leading to more targeted biomarkers [73]. |
Experimental Protocol for Implementing a Multi-Omics Workflow [73] [8]:
- Study Design: Incorporate the collection of multiple bio-specimens (e.g., plasma, urine, stool) suitable for different omics analyses.
- Sample Processing: Standardize protocols for sample collection, processing, and storage to preserve the integrity of labile molecules for metabolomics and proteomics.
- Data Generation: Conduct genomic, metabolomic, and proteomic analyses on participant samples.
- Data Integration: Use bioinformatics tools and AI-driven platforms to integrate the multi-omics datasets, identifying complex biomarker patterns that are not apparent from single-platform analysis.
Frequently Asked Questions (FAQs)
1. What is the core purpose of the BRINDA adjustment method? The BRINDA method was developed to improve the accuracy of micronutrient biomarker interpretation in populations where inflammation is common. Inflammation can significantly confound the measurement of biomarkers like ferritin and retinol-binding protein (RBP), leading to an overestimation or underestimation of deficiency prevalences. The method uses statistical correction to account for these confounding effects, providing a more reliable estimate of micronutrient status for policy and program decisions [75] [76].
2. Which biomarkers can be adjusted using the BRINDA method? The BRINDA method provides specific guidance for adjusting key iron and vitamin A biomarkers. The primary biomarkers include:
- Ferritin (iron status) [77]
- Soluble transferrin receptor (sTfR) (iron status) [77]
- Retinol-binding protein (RBP) (vitamin A status) [77]
- Retinol (vitamin A status) [77]
3. What biomarkers of inflammation are required to apply the BRINDA method? The adjustment requires data on at least one of two acute phase proteins:
- C-reactive protein (CRP)
- α-1-acid glycoprotein (AGP) [77]
The method uses elevations in these proteins to identify a state of inflammation and to apply the appropriate correction to the micronutrient biomarker values.
4. Should malaria infection be included in the adjustment model? Yes. Recent guidance from the BRINDA group recommends including malaria infection (as a binary variable) in the adjustment model where data is available. This provides a more comprehensive adjustment for the confounding effects of infectious diseases [75] [76].
5. What software can I use to implement the BRINDA method? To streamline analysis, the BRINDA group provides standardized and user-friendly statistical code:
These tools help researchers avoid the need to develop their own programming scripts from scratch, reducing errors and saving time.
Troubleshooting Guide: Common BRINDA Implementation Issues
This guide addresses specific problems you might encounter when applying the BRINDA method to your own data.
| Problem | Possible Causes | Recommended Solution |
|---|---|---|
| Inconsistent adjustment results | Applying the same adjustment model to all biomarkers; not accounting for malaria. | Use biomarker-specific regression formulas. Include malaria status in the model if data is available [75] [76]. |
| Software coding errors | Manually programming complex regression corrections without standardized code. | Use the official BRINDA R package or SAS macro to ensure the methodology is applied correctly [75]. |
| Interpreting adjusted vs. unadjusted values | Lack of clarity on how the adjustment changes biomarker concentrations and deficiency prevalences. | The adjustment typically increases the estimated prevalence of deficiency for ferritin and decreases it for RBP. Always compare adjusted and unadjusted values to understand the impact of inflammation in your population [77]. |
| Data management challenges | Inconsistent variable definitions or laboratory methods across merged datasets. | Prior to analysis, harmonize your data using a standardized dictionary. Ensure laboratory methodologies for biomarkers (e.g., ELISA) are comparable [77]. |
Experimental Protocol: Applying the BRINDA Regression Adjustment
The following workflow provides a detailed methodology for adjusting micronutrient biomarkers using the BRINDA approach.
Step 1: Data Collection and Harmonization Gather individual-level data on micronutrient biomarkers (ferritin, RBP, etc.), inflammation biomarkers (CRP and AGP), and malaria infection status. Standardize these variables across your dataset, ensuring consistent units and measurement techniques [77].
Step 2: Define the Inflammatory Response Categorize the level of inflammation for each individual based on established thresholds for CRP and AGP. The BRINDA project typically uses the following classifications:
- Incubation: Elevated CRP only (>5 mg/L)
- Early Convalescence: Elevated both CRP (>5 mg/L) and AGP (>1 g/L)
- Late Convalescence: Elevated AGP only (>1 g/L)
- No Inflammation: Neither CRP nor AGP is elevated [77].
Step 3: Execute the Regression Correction The core of the BRINDA method involves running an internal linear regression model. The general form of the model is:
ln(biomarker) = β₀ + β₁(lnCRP) + β₂(lnAGP) + β₃(malaria) + ε
Where:
ln(biomarker)is the natural log of the micronutrient concentration (e.g., ferritin).β₀is the intercept.β₁andβ₂are coefficients for the natural log of CRP and AGP, respectively.β₃is the coefficient for malaria infection (if included).εis the error term [75] [77] [76].
Step 4: Calculate Adjusted Biomarker Values Use the coefficients from the regression model to calculate adjusted values. The formula for the adjusted biomarker concentration is:
Adjusted biomarker = exp[ ln(observed biomarker) - β₁(lnCRP - reflnCRP) - β₂(lnAGP - reflnAGP) - β₃(malaria) ]
The reference values (reflnCRP, reflnAGP) are set to the lowest decile of the inflammation biomarkers in your population, representing a state of minimal inflammation [75].
Step 5: Analyze the Adjusted Dataset After generating the adjusted biomarker values, you can proceed with your final analysis. Calculate the prevalence of deficiencies using standard cutoff values for the adjusted data and compare them with the unadjusted prevalences to quantify the impact of inflammation.
Research Reagent Solutions
The table below lists essential reagents and tools required for implementing research involving the BRINDA method.
| Item | Function / Application |
|---|---|
| CRP & AGP Immunoassays | Quantify concentrations of inflammation biomarkers in serum or plasma. Essential for classifying subjects' inflammatory status. |
| Micronutrient Immunoassays | Measure concentrations of ferritin, sTfR, RBP, or retinol. The VitMin Lab sandwich ELISA is a referenced methodology [77]. |
| Malaria Rapid Test or Blood Smear | Determine the presence of active malaria infection for inclusion in the extended adjustment model. |
| BRINDA R Package / SAS Macro | Pre-programmed statistical tools to perform the regression correction, ensuring standardized and reproducible application of the method [75]. |
| HemoCue or Portable Hemoglobinometer | Measure hemoglobin concentration for concurrent anemia assessment, a key outcome in BRINDA-related etiological analyses [78] [77]. |
FAQs on Feasibility and Quality Control Frameworks
FAQ 1: What is the primary purpose of a pilot study in nutritional biomarker research?
The primary purpose is to assess the feasibility of methods and procedures, not to estimate intervention effects. A pilot study tests whether you can successfully recruit participants, collect data using specific protocols (like questionnaires, performance tests, or biospecimen collection), and implement an intervention as intended. The focus is on identifying and resolving logistical challenges before committing to a larger, more costly study [79].
FAQ 2: What are the key feasibility indicators to monitor in a pilot study?
Key indicators are quantitative and qualitative metrics that help you decide whether to proceed, and how to modify your approach for the main study. The table below summarizes core feasibility indicators [79].
Table 1: Key Feasibility Indicators for Pilot Studies
| Category | Specific Indicator | Data Sources & Measurement Strategies |
|---|---|---|
| Participant Recruitment & Retention | Recruitment rate, retention/drop-out rate, reasons for non-participation. | Administrative data (numbers recruited/retained), structured surveys on burden, open-ended interviews. |
| Assessment Procedures | Completion rates and times for specific components, perceived burden, extent of missing data. | Tracking logs, timing of assessments, participant feedback via surveys or interviews. |
| Intervention Fidelity | Whether interventionists deliver the intervention as intended. | Observer ratings using checklists, audio/video recordings of sessions. |
| Participant Adherence & Engagement | Level of participation in program components (e.g., session attendance). | Attendance logs, usage data from digital platforms, adherence to protocol (e.g., biospecimen collection). |
| Acceptability | Satisfaction and perceived appropriateness for both participants and interventionists. | Structured ratings, semi-structured open-ended interviews. |
FAQ 3: Why is ongoing quality control (QC) for laboratory assays critical in nutritional biomarker research?
Ongoing QC is essential to reduce error variation that arises from inconsistencies in specimen handling, assay performance, and data management. Substantial between-assay variations are common, and without standardization, the interpretability of findings is compromised, and opportunities for coherent data pooling in meta-analyses are lost [6]. For example, in large-scale studies like the UK Biobank, factors such as spectrometer batch effects, drift over time within a spectrometer, and sample preparation time can introduce unwanted technical variation that must be identified and removed statistically to reveal true biological signals [80].
Troubleshooting Guides for Common Experimental Scenarios
Guide 1: Troubleshooting Faint or Smeared Bands in Nucleic Acid Gel Electrophoresis
Gel electrophoresis is a common quality control step to check nucleic acid samples (e.g., extracted DNA or RNA) for integrity and concentration before downstream analysis.
Problem: You observe faint bands or no bands at all after gel electrophoresis and staining [81] [82].
Table 2: Troubleshooting Faint or No Bands
| Possible Cause | Recommended Solution |
|---|---|
| Low quantity/concentration of sample. | Load a minimum of 0.1–0.2 μg of DNA or RNA per millimeter of gel well width. Use a gel comb with deep, narrow wells [81]. |
| Sample degradation. | Use molecular biology grade reagents and nuclease-free labware. Always wear gloves and work in designated, clean areas [81]. |
| DNA electrophoresed off the gel. | Reduce electrophoresis time, use a lower voltage, or use a higher percentage gel [82]. |
| Incorrect visualization. | For ethidium bromide, use a short-wavelength (254 nm) UV light for greater sensitivity [82]. Check that the light source is optimal for your specific fluorescent dye [81]. |
| Reversed electrodes. | Confirm the gel wells are on the same side as the negative electrode (cathode) when setting up a horizontal gel [81]. |
Problem: You observe smeared, diffused, or fuzzy bands [81] [82].
Table 3: Troubleshooting Smeared Bands
| Possible Cause | Recommended Solution |
|---|---|
| Sample overloading. | Do not overload wells; the general recommendation is 0.1–0.2 μg of sample per millimeter of a gel well's width [81]. |
| Sample degradation. | Ensure reagents are nuclease-free and follow good lab practices to prevent contamination [81]. |
| Too much salt or protein in the sample. | Purify or precipitate the nucleic acid sample to remove excess salt or protein. Use phenol extractions for protein removal [82]. |
| Incorrect gel type or voltage. | For single-stranded nucleic acids (e.g., RNA), use a denaturing gel. Avoid very high or low voltages [81]. |
| Poorly formed wells. | Do not push the comb to the very bottom of the gel tray. Remove the comb carefully after the gel has fully solidified [81]. |
Guide 2: A Systematic Framework for General Experimental Troubleshooting
When an experiment fails, a methodical approach is more effective than random guesses. The following workflow outlines a robust troubleshooting methodology.
Systematic Troubleshooting Workflow
- Identify the Problem: Precisely define what went wrong without assuming the cause. Example: "No PCR product was detected on the agarose gel," not "The Taq polymerase was bad." [83].
- List All Possible Explanations: Brainstorm every potential cause, from the obvious (each reagent, equipment) to the easily overlooked (minor protocol deviations, environmental conditions) [83].
- Collect the Data: Investigate the easiest explanations first.
- Controls: Check if positive and negative controls worked as expected [83].
- Equipment & Reagents: Verify equipment is functioning. Check reagent expiration dates and storage conditions [3] [83].
- Procedure: Review your lab notebook against the established protocol for any missed steps or unrecorded modifications [83].
- Eliminate Explanations: Based on your data collection, rule out causes that are not supported. For example, if positive controls worked, you can likely eliminate the core reagents and equipment as the source of failure [83].
- Check with Experimentation: For the remaining possible causes, design a controlled experiment to test them. It is critical to change only one variable at a time to isolate the true cause [3] [83].
- Identify the Cause and Document: Once the root cause is confirmed, plan how to fix it. Meticulously document the entire troubleshooting process in your lab notebook so you and others can learn from it [3] [83].
The Scientist's Toolkit: Essential Research Reagent Solutions
Table 4: Key Research Reagents and Their Functions in Biomarker Research
| Reagent / Material | Critical Function | Key Quality Control Considerations |
|---|---|---|
| Commercial Immunoassay/ELISA Kits | Quantification of specific protein biomarkers (e.g., CRP, ferritin). | Many lack adequate validation. Always report the manufacturer, product number, and performance characteristics like limits of detection (LOD) and intra-assay coefficients of variation (CV) [6]. |
| Nucleic Acid Stains | Visualization of DNA/RNA in gels for QC of sample quality. | Check sensitivity; some stains have higher affinity for double or single-stranded molecules. For thick gels, allow longer staining for penetration [81]. |
| Competent Cells | Used in molecular cloning for plasmid propagation. | Check transformation efficiency and ensure proper storage (-80°C). Cells should maintain efficiency for at least a year when stored correctly [83]. |
| Primary and Secondary Antibodies | Detection of specific proteins in techniques like immunohistochemistry (IHC). | Must be compatible. Store at correct temperature. Check for batch-to-batch variability. Include positive and negative controls in every experiment [3]. |
| Molecular Biology Grade Water & Buffers | Solvent and matrix for preparing samples and reagents. | Must be nuclease-free to prevent sample degradation. Ensure buffers have high enough capacity for long electrophoresis runs [81]. |
Validation and Calibration: Ensuring Accuracy and Comparability in Research
FAQs on Biomarker Validation Frameworks
Q1: What is the key difference between a recovery biomarker and a self-report instrument in nutritional studies?
A1: Recovery biomarkers, such as those for energy and protein intake, are objective biochemical measurements that do not rely on memory or self-reported consumption. They use biological principles (like energy metabolism or urinary nitrogen excretion) to provide a reference measurement that is largely independent of self-reporting errors. In contrast, self-report instruments like Food Frequency Questionnaires (FFQs) or 24-hour recalls are subjective and are known to contain significant measurement error, including systematic under-reporting [84].
Q2: How do correlation coefficients differ between dietary self-reports and recovery biomarkers?
A2: Pooled data from large validation studies show that self-report instruments have modest correlations with true intake, as measured by recovery biomarkers. The table below summarizes the average correlation coefficients for different methods [84]:
| Dietary Assessment Method | Correlation with True Energy Intake | Correlation with True Protein Intake | Correlation with True Protein Density |
|---|---|---|---|
| Food Frequency Questionnaire (FFQ) | 0.21 | 0.29 | 0.41 |
| Single 24-Hour Recall | 0.26 | 0.40 | 0.36 |
| Averaged 24-Hour Recalls (e.g., 3 recalls) | 0.31 | 0.49 | 0.46 |
A3: Errors can arise at multiple points, from pre-analytical handling to the final laboratory analysis. Key sources include [6] [85]:
- Pre-analytical Variables: Sample collection procedures, type of tube/anticoagulant used, processing delays, and storage conditions.
- Analytical Variables: Lack of assay standardization, poor precision, inadequate limits of detection, and lot-to-lot reagent variation.
- Biological and Individual Factors: Within-subject correlation (multiple samples from one person), inflammation status (which can affect micronutrient levels), body mass index, age, and educational level.
Q4: What is a "fit-for-purpose" or "context-of-use" validation approach?
A4: "Fit-for-purpose" validation means that the extent of assay validation is driven by the specific intended use of the biomarker data in a research or regulatory decision-making context. An exploratory research tool may require less rigorous validation than a biomarker intended for use as a surrogate endpoint in a clinical trial or for diagnostic purposes. The "context-of-use" (COU) defines this specific purpose and dictates the necessary assay performance characteristics, such as precision, accuracy, and stability [85] [86].
Q5: Which personal characteristics are known to predict under-reporting in self-reported dietary data?
A5: Studies using recovery biomarkers have consistently found that a higher body mass index (BMI) is a strong predictor of under-reporting energy and protein intakes. Other factors include lower educational attainment and age [84].
Troubleshooting Guides for Biomarker Experiments
Issue 1: High Proportion of Unquantifiable/Undetectable Biomarker Results
Potential Causes:
- The analyte concentration is below the assay's lower limit of quantification (LLOQ) [6].
- Degradation of the biomarker due to improper sample handling or storage [85].
Solutions:
- Validate and Report Limits: During method validation, clearly establish and report the LOD (Limit of Detection) and LLOQ. The LLOQ is the lowest concentration that can be quantitatively measured with acceptable accuracy and precision [6].
- Handle Data Appropriately: Do not simply exclude unquantifiable samples. Use statistically sound methods for data analysis, such as substitution with a value (e.g., LLOQ/√2) or multiple imputation, and perform sensitivity analyses to ensure conclusions are robust [6].
- Review Pre-analytical Protocols: Standardize and strictly control sample collection, processing, and storage conditions to maximize analyte stability.
Issue 2: Poor Correlation Between a Novel Biomarker and a Reference Method
Potential Causes:
- High within-subject biological variation overshadowing the analytical signal.
- Unaccounted for confounding factors (e.g., inflammation affecting a nutrient biomarker) [6] [87].
- Selection bias in the study population [87].
Solutions:
- Account for Biological Variability: Collect multiple samples per subject where feasible and use statistical models (e.g., mixed-effects models) that account for within-subject correlation [87].
- Measure and Adjust for Confounders: In nutritional studies, always measure and adjust for biomarkers of inflammation (e.g., C-reactive protein (CRP) and α-1 acid glycoprotein (AGP)) when interpreting micronutrient status [6].
- Control for Multiplicity: If testing multiple biomarkers or endpoints, use statistical corrections for multiple comparisons (e.g., False Discovery Rate control) to minimize the risk of false-positive findings [19] [87].
Issue 3: Lack of Reproducibility or High Assay Imprecision
Potential Causes:
- Inconsistent laboratory techniques or reagent batches.
- Lack of a well-characterized and stable reference standard [85].
Solutions:
- Use Endogenous Quality Controls (QCs): For biomarker assays, use endogenous QCs (pooled human samples) in addition to recombinant protein calibrators for monitoring assay performance and stability, as they more closely represent the real analyte [85].
- Implement Rigorous QC Procedures: Follow analytical quality control practices, determine intra- and inter-assay precision (CV%), and ensure all technicians are trained on a standardized protocol [6] [85].
- Document Everything: Maintain detailed records of all procedures, reagent lots, and equipment calibrations to help trace the source of variability [3].
Issue 4: Inconsistent Results When Pooling Data from Different Studies
Potential Causes:
- Lack of Standardization across studies in laboratory methods, sample handling, and assays used to measure the biomarker [6].
Solutions:
- Promote Transparent Reporting: Journals and researchers should adopt minimum reporting requirements for laboratory methods. This includes detailed protocols for specimen handling, specific assay manufacturers and product numbers, LLOQ/ULOQ, and precision estimates [6].
- Develop Calibration Equations: In cases where absolute values differ between methods, use study-specific calibration equations that include personal characteristics (e.g., BMI, age) to improve the prediction of true intake [84].
Performance Data: Self-Reports vs. Biomarkers
The following table quantifies the systematic under-reporting found in dietary self-report instruments when validated against recovery biomarkers [84].
| Assessment Method | Average Under-reporting of Energy Intake | Factors Influencing Under-reporting |
|---|---|---|
| Food Frequency Questionnaire (FFQ) | 28% | Body Mass Index (BMI) (strongest predictor), Educational level, Age |
| Single 24-Hour Recall | 15% | Body Mass Index (BMI), Educational level, Age |
The Scientist's Toolkit: Key Research Reagent Solutions
The table below lists essential materials and their functions in developing and validating biomarker assays [88] [85].
| Reagent / Material | Function in Biomarker Workflow |
|---|---|
| Validated Antibody Pairs (for LBAs) | Ensure specific and sensitive detection of the target protein biomarker in techniques like ELISA. |
| Endogenous Quality Control (QC) Samples | Pooled biological fluid (e.g., human serum/plasma) with a known concentration of the biomarker; critical for monitoring assay performance and analyte stability. |
| Recombinant Protein Calibrators | Used to create a standard curve for quantification, though they may not perfectly mimic the endogenous biomarker. |
| Specific Assay Kits & Platforms | Commercial kits (e.g., immunoassays) provide standardized reagents, but require thorough in-house validation for the specific Context of Use. |
| Specimen Collection Tubes | The choice of tube (e.g., serum, EDTA plasma, trace-element-free) is a critical pre-analytical variable that can affect biomarker stability and measurement. |
Workflow: Navigating Biomarker Validation
The diagram below outlines a logical pathway for developing and validating a nutritional biomarker method, emphasizing a fit-for-purpose approach.
Experimental Protocol: A Framework for Biomarker Method Validation
This protocol provides a generalized methodology for the fit-for-purpose validation of a ligand-binding assay (LBA) for a nutritional biomarker, based on current best practices and regulatory considerations [85] [86].
Objective: To establish and validate a precise, accurate, and robust analytical method for quantifying a specific biomarker in human serum/plasma, appropriate for its intended Context of Use (COU).
Materials:
- Reference Standard: Recombinant or purified form of the biomarker.
- Quality Controls (QCs): Prepared in the same biological matrix as study samples (e.g., pooled human serum). Using endogenous QCs is critical for stability testing.
- Assay Components: All necessary reagents, buffers, plates, and detection systems as required by the selected platform (e.g., ELISA).
- Equipment: Precision pipettes, plate washers, readers, and data analysis software.
Procedure:
Step 1: Pre-Analytical Variable Assessment Before validation begins, conduct experiments to determine the impact of key pre-analytical variables on the stability of your biomarker. This includes testing stability under different conditions: freeze-thaw cycles, short-term room temperature storage, long-term frozen storage, and bench-top stability post-thaw [85].
Step 2: Method Development
- Calibrator Preparation: Prepare a dilution series of the reference standard in the appropriate biological matrix.
- QC Preparation: Prepare at least three levels of QCs (low, medium, high) covering the expected physiological range.
- Preliminary Testing: Optimize assay conditions (incubation times, temperatures, reagent concentrations) to achieve acceptable sensitivity and dynamic range.
Step 3: Fit-for-Purpose Validation Execute a validation plan to assess the following parameters, with acceptance criteria defined by the COU:
- Precision and Accuracy: Run at least five replicates of each QC level across multiple days to determine intra-assay (within-run) and inter-assay (between-run) precision (%CV) and accuracy (% deviation from nominal concentration).
- Parallelism: Test serial dilutions of a sample with a high endogenous level of the biomarker. The measured concentrations should be parallel to the standard curve, demonstrating that the assay accurately measures the endogenous analyte in its native matrix [85] [86].
- Specificity/Selectivity: Demonstrate that the assay is not significantly interfered with by related substances, matrix components, or common concomitant medications.
- Sensitivity: Determine the Lower Limit of Quantification (LLOQ), the lowest concentration that can be measured with defined precision and accuracy (typically ≤20% CV and ±20% bias).
- Range: Establish the range of concentrations between the LLOQ and the Upper Limit of Quantification (ULOQ) over which the assay is precise and accurate.
Step 4: Documentation and Reporting
- Maintain a detailed validation report.
- Document all procedures, raw data, and statistical analyses.
- Clearly state the final, validated assay protocol, including all critical steps and acceptance criteria for future sample runs [3].
Calibrating Subjective Dietary Assessments with Objective Biomarker Data
Frequently Asked Questions (FAQs)
FAQ 1: What is the primary purpose of using biomarkers in dietary assessment? Nutritional biomarkers provide an objective measure of dietary exposure and nutritional status, circumventing the fundamental limitation of measurement error inherent in self-reported subjective assessments like food frequency questionnaires (FFQs) or 24-hour recalls [2]. They reflect the complex process of nutrient absorption, metabolism, and excretion, offering a more reliable indicator of actual intake than memory-dependent methods [89].
FAQ 2: When should I use a recovery biomarker versus a concentration biomarker? The choice depends on your research question and logistical constraints. Recovery biomarkers (e.g., doubly labelled water for energy, urinary nitrogen for protein) are based on metabolic balance and can be used to assess absolute intake. They are ideal for validation studies but are often expensive and burdensome [2]. Concentration biomarkers (e.g., plasma vitamin C, carotenoids) are correlated with intake and are excellent for ranking individuals within a population. They are more common but influenced by metabolism and personal characteristics, so they do not measure absolute intake [2].
FAQ 3: Our biomarker data shows high variability. What are the common pre-analytical sources of error? High variability can stem from several pre-analytical factors [2]:
- Time of Day: Biomarkers like some blood concentrations can exhibit diurnal variation. Standardize the timing of sample collection.
- Physiological State: Fasting vs. non-fasting状态 can significantly impact levels of fat-soluble biomarkers.
- Seasonal Variation: Biomarkers like plasma lycopene (from tomato consumption) or 25-hydroxy vitamin D (from sun exposure) can fluctuate with seasons.
- Sample Handling: Inadequate processing or repeated freeze-thaw cycles can degrade samples. Store aliquots at -80°C or in liquid nitrogen.
FAQ 4: How can I assess the completeness of a 24-hour urine collection? Compliance for 24-hour urinary sampling can be assessed using para-aminobenzoic acid (PABA). Participants take PABA tablets, and if urinary recovery is high (e.g., >85%), the collection is considered complete. This is crucial for recovery biomarkers like urinary nitrogen, potassium, and sodium [2].
FAQ 5: Which biomarker is best for validating fruit and vegetable intake? Plasma vitamin C and plasma carotenoids (e.g., β-carotene, lycopene) are well-established concentration biomarkers for fruit and vegetable intake. Studies like EPIC-Norfolk have shown they can provide a stronger association with health outcomes, such as type 2 diabetes, than self-reported intake data [2] [89].
Troubleshooting Common Experimental Issues
Issue 1: Discrepancy Between Self-Reported Data and Biomarker Measurements
Problem: Biomarker levels (e.g., urinary nitrogen) are consistently lower than what would be expected from self-reported dietary intake.
Possible Causes and Solutions:
- Cause: Under-reporting of intake. This is a common limitation of subjective methods, particularly for foods perceived as socially undesirable [47].
- Solution: Use the biomarker to calibrate the self-reported data. Statistical models can be developed to correct for the measurement error in the subjective reports based on the recovery biomarker [2].
- Solution: In future studies, incorporate technologies like wearable cameras to objectively capture food consumption and identify misreporting patterns [47].
- Cause: Improper sample collection or storage.
Issue 2: High Intra-Individual Variability in Biomarker Measurements
Problem: A participant's biomarker levels vary widely from one measurement to the next, making it difficult to determine habitual intake.
Possible Causes and Solutions:
- Cause: Biomarker reflects short-term intake.
- Solution: Select a biomarker matrix that matches your time frame of interest. Use erythrocytes (half-life ~120 days) or adipose tissue for long-term intake instead of serum/plasma or urine, which reflect short-term intake (days to weeks) [2].
- Solution: Conduct repeated measurements over time to better estimate habitual levels, as a single measure may not be representative [2].
- Cause: Uncontrolled confounding factors.
Issue 3: Inability to Detect Change After a Dietary Intervention
Problem: Self-reported data indicates high compliance with an intervention, but expected changes in biomarker levels are not observed.
Possible Causes and Solutions:
- Cause: The chosen biomarker is not sensitive to the dietary change.
- Solution: Carefully match the biomarker to the intervention. For example, if testing a low-sodium intervention, urinary sodium is a direct recovery biomarker. Using a less specific marker may not show an effect [2].
- Solution: Consider using a panel of biomarkers instead of a single one. A combination can provide a more comprehensive and sensitive assessment of dietary change [22].
- Cause: Insufficient intervention duration or intensity.
- Solution: Ensure the intervention is long enough and the dietary change is substantial enough to alter biomarker levels. Pilot studies can help determine the required parameters.
Experimental Protocols for Key Biomarkers
Protocol for Urinary Nitrogen as a Recovery Biomarker for Protein Intake
Principle: Over 90% of nitrogen ingested as protein is excreted in urine over 24 hours as urea. Measuring total urinary nitrogen provides a highly accurate measure of total protein intake [2].
Detailed Methodology:
- Sample Collection: 24-hour urine collection.
- Compliance Check: Participants ingest PABA tablets (e.g., 80 mg three times daily). A 24-hour urine collection is considered complete if PABA recovery is >85% [2].
- Materials:
- Reagent: PABA tablets.
- Equipment: Pre-treated urine collection jugs, aliquoting tubes, -80°C freezer.
- Analysis: Kjeldahl method or chemiluminescence for total nitrogen measurement.
- Procedure:
- Provide participants with clear verbal and written instructions for the 24-hour collection (start after first void, collect all urine for 24 hours, including first void the next morning).
- Provide PABA tablets with timed intake instructions.
- Collect the jug, record total volume.
- Aliquot urine into several tubes to avoid repeated freeze-thaw cycles.
- Store aliquots at -80°C until analysis.
- Analyze PABA and total nitrogen concentrations.
Protocol for Plasma Vitamin C as a Concentration Biomarker for Fruit and Vegetable Intake
Principle: Vitamin C is a water-soluble vitamin obtained primarily from fruits and vegetables. Plasma levels correlate with recent intake and are used to rank individuals by their consumption [2].
Detailed Methodology:
- Sample Collection: Fasting blood sample (5-10 mL) into a tube containing a stabilizer.
- Stabilization: Crucial step. Blood must be collected in tubes containing meta-phosphoric acid (MPA) or immediately processed with MPA to prevent oxidation of vitamin C [2].
- Materials:
- Reagent: meta-Phosphoric acid.
- Equipment: EDTA or heparin blood collection tubes, centrifuge, pipettes, amber vials or vials wrapped in foil to protect from light, -80°C freezer.
- Procedure:
- Collect blood from participants who have fasted for at least 8 hours.
- Centrifuge blood within 30 minutes of collection to separate plasma.
- Immediately mix plasma with a stabilizing agent like MPA.
- Aliquot the stabilized plasma into cryovials.
- Flash-freeze in liquid nitrogen and store at -80°C.
- Analyze using high-performance liquid chromatography (HPLC) with UV detection.
The Scientist's Toolkit: Research Reagent Solutions
Table 1: Essential Materials for Nutritional Biomarker Research
| Item | Function/Application | Key Considerations |
|---|---|---|
| Doubly Labelled Water | Gold-standard recovery biomarker for measuring total energy expenditure (and thus energy intake in weight-stable individuals) [2]. | Very expensive; requires specialized mass spectrometry for analysis. |
| PABA (Para-aminobenzoic acid) | Used to validate the completeness of 24-hour urine collections [2]. | Administered in tablets; recovery is measured in the urine. |
| meta-Phosphoric Acid (MPA) | Stabilizing agent for vitamin C in blood samples; prevents oxidation [2]. | Critical for accurate measurement of vitamin C. |
| Liquid Nitrogen | Used for flash-freezing biological samples to preserve labile biomarkers before long-term storage at -80°C [2]. | Preserves sample integrity, especially for metabolites and vitamins. |
| Serum/Plasma Separator Tubes | For collection of blood serum or plasma. Choice of anticoagulant (e.g., EDTA, Heparin) can affect biomarker analysis [2]. | Standardize tube type across a study to minimize pre-analytical variation. |
| Cryogenic Vials | For long-term storage of biological samples at ultra-low temperatures (-80°C) [2]. | Use different aliquots for each biomarker to avoid freeze-thaw cycles. |
Workflow and Pathway Visualizations
Biomarker Selection and Validation Workflow
Nutritional Biomarker Metabolism and Indicator Pathways
Troubleshooting Guides
Guide 1: Addressing Underreporting in Dietary Data
Problem: Self-reported dietary data from FFQs or 24-hour recalls shows suspected underreporting, particularly among participants with higher BMI.
Symptoms:
- Lower calculated energy intake compared to basal metabolic rate.
- Lower energy percent (E%) from total fat and higher E% from carbohydrates in reported diets.
- Weakened or inconsistent correlations between reported nutrient intake and their corresponding biomarkers.
Solutions:
- Statistical Identification: Calculate the ratio of energy intake to basal metabolic rate. Participants with a ratio below a defined threshold (e.g., 1.35) may be underreporters [90].
- Biomarker Correlation: Use 24-hour urinary nitrogen as a recovery biomarker to validate reported protein intake. A significant discrepancy suggests underreporting [90] [84].
- Data Handling: In analysis, consider stratifying data by underreporting status or excluding identified underreporters to improve the correlation between dietary intake and biomarker data [90].
Guide 2: Improving the Accuracy of Self-Reported Instruments
Problem: Single 24-hour recalls or FFQs show low correlation with true intake for energy and absolute nutrients.
Symptoms:
- Low correlation coefficients between the dietary instrument and recovery biomarkers.
- High rate of under-reporting, especially for energy intake.
Solutions:
- Multiple Recalls: Increase the number of 24-hour recalls. Averaging three 24-hour recalls significantly improves correlation with true intake for protein and protein density compared to a single recall [84].
- Use Density Measures: When using FFQs, analyze nutrient density (e.g., protein as a percentage of total energy) rather than absolute intake, as this metric shows stronger correlation with truth [84].
- Calibration Equations: Develop and apply calibration equations that use personal characteristics (like BMI, education, and age) to correct for systematic bias in self-reported data [84].
Guide 3: Managing Variability in Biomarker Laboratory Analysis
Problem: Inconsistent or unreliable biomarker results due to non-standardized laboratory practices.
Symptoms:
- Inability to pool biomarker data from different studies for meta-analysis.
- Poor concordance between different commercial assays for the same biomarker.
- A high proportion of samples with values below the assay's limit of detection.
Solutions:
- Pre-Analytical Protocol: Establish and meticulously document standardized procedures for specimen collection, handling, and storage to maintain analyte stability [91].
- Assay Selection & Reporting: Select well-validated commercial assays. In publications, fully report the manufacturer, product number, and key performance characteristics including limits of detection (LOD), limits of quantification (LOQ), and intra- and inter-assay coefficients of variation (CV) [91].
- Data Handling Plan: Predefine a statistical approach for handling values below the LOQ (e.g., multiple imputation or substitution with LOQ/√2) to avoid bias [91].
Frequently Asked Questions (FAQs)
FAQ 1: How do biomarkers address the limitations of FFQs and 24-hour recalls? Biomarkers provide an objective measure that bypasses the systematic errors of self-reporting. They are not reliant on participant memory, portion size estimation, or food composition tables. Furthermore, biomarkers can reflect the bioactive nutrient fraction actually absorbed by the body, which is influenced by factors like food matrix, cooking methods, and individual differences in metabolism—factors that dietary questionnaires cannot capture [8].
FAQ 2: What is a key indicator that underreporting is affecting my study's results? A key indicator is a weak correlation between reported nutrient intake and validated nutritional biomarkers. For example, if the correlation between reported vitamin C intake and its serum biomarker is low, it may be due to widespread underreporting. Studies have shown that after excluding underreporters, the correlation between calculated intake and biomarkers significantly increases [90].
FAQ 3: When should I use the Method of Triads in a validation study? The Method of Triads is particularly valuable when you have three measures of dietary intake and want to estimate their correlation with the unobservable "true" intake. It is used in validation studies to calculate validity coefficients between a latent true intake and three different measures, which typically include a questionnaire (e.g., FFQ), a reference method (e.g., multiple 24-hour recalls), and a biomarker [92]. This approach provides a more robust evaluation of an FFQ's validity.
FAQ 4: What are the most critical details to report when publishing biomarker data? To ensure interpretability and reproducibility, you must report [91]:
- Specimen Handling: Detailed protocols for collection, storage, and freeze-thaw cycles.
- Assay Information: The specific manufacturer, product number, and analyzer platform.
- Performance Characteristics: The assay's limit of detection (LOD), lower limit of quantification (LLOQ), and intra- and inter-assay precision (CVs).
- Data Management: How values outside the quantification limits were handled statistically.
The tables below summarize key quantitative findings from validation studies comparing dietary assessment methods and their correlation with biomarkers.
Table 1: Correlation of Self-Reported Intakes with Recovery Biomarkers (Pooled Analysis)
| Dietary Instrument | Energy Intake (r) | Protein Intake (r) | Protein Density (r) | Avg. Under-reporting of Energy |
|---|---|---|---|---|
| FFQ | 0.21 | 0.29 | 0.41 | 28% |
| Single 24-hour Recall | 0.26 | 0.40 | 0.36 | 15% |
| Averaged 24-hour Recalls (x3) | 0.31 | 0.49 | 0.46 | N/A |
Source: [84]
Table 2: Comparison of FFQs and 24-Hour Recalls in Women (with Biomarkers)
| Metric | FFQ | 24-Hour Recalls | Notes |
|---|---|---|---|
| Total Energy Intake | 8,183 ± 2,893 kJ | 9,516 ± 2,080 kJ | p < 0.01 [90] |
| Correlation with Vitamin C Biomarker | r = 0.316-0.393 | r = 0.316-0.393 | Similar for both methods [90] |
| Correlation with Potassium Biomarker | r = 0.316-0.393 | r = 0.316-0.393 | Similar for both methods [90] |
| BMI of Underreporters | 27.7 ± 5.5 kg/m² | 27.7 ± 5.5 kg/m² | vs. 23.8 ± 3.7 kg/m² for others [90] |
Source: [90]
Experimental Protocols
Protocol 1: Validating a Food Frequency Questionnaire (FFQ) Using Biomarkers and the Method of Triads
This protocol outlines the procedure for validating polyphenol intake estimates from an FFQ, as demonstrated in a study with 899 adults [92].
1. Study Design and Data Collection:
- Participants: Recruit a sample representative of the target population for the FFQ.
- Dietary Assessment:
- Administer the FFQ to assess habitual dietary intake over a defined period.
- Collect multiple repeated 24-hour dietary recalls (e.g., 6 recalls) as a reference method. The mean of these recalls is used for comparison.
- Biomarker Measurement:
- Collect 24-hour urine samples for analysis of Total Urinary Polyphenols (TUP), a biomarker of polyphenol intake.
- Collect blood samples for analysis of plasma carotenoids, which can serve as a surrogate biomarker for fruit and vegetable intake.
2. Laboratory Analysis:
- Total Urinary Polyphenols: Analyze urine samples using a modified Folin-Ciocalteu assay to determine total phenolic compounds [92].
- Plasma Carotenoids: Quantify carotenoid concentrations using reversed-phase high-performance liquid chromatography (HPLC) [92].
3. Data Analysis:
- Calculate Pearson correlation coefficients between the FFQ, the 24-hour recalls, and the TUP biomarker. Apply deattenuation correction to account for within-person variation in the 24-hour recalls.
- Apply the Method of Triads using the following three variables to estimate validity coefficients (VC) and their 95% confidence intervals for the latent "true" intake:
- FFQ estimate
- Mean of 24-hour recalls
- Biomarker (TUP or plasma carotenoids)
The relationship in the Method of Triads is illustrated below:
Protocol 2: A Novel Platform for Quantitative Biomarker Analysis in Complex Matrices
This protocol summarizes an innovative approach using cell-free expression (CFE) to quantify biomarkers, such as zinc, in complex samples like blood serum, overcoming matrix effects [93].
1. Sensor Design and Principle:
- Regulator Plasmid (pZntR): Construct a plasmid that constitutively expresses a zinc-responsive transcriptional activator (ZntR).
- Reporter Plasmid (pLacZ): Construct a plasmid containing the β-galactosidase gene (LacZ) under the control of the ZntR-responsive promoter (PzntA).
- Colorimetric Reaction: β-galactosidase enzyme cleaves the yellow substrate chlorophenol red-β-d-galactopyranoside (CPRG) to produce a purple product (CPR).
2. Experimental Workflow:
- Test Reaction: The patient's serum sample is added to a CFE reaction containing the pZntR and pLacZ plasmids. The final color (from yellow to purple) depends on the zinc concentration in the sample.
- Parallel Calibration: A set of standard reference reactions are run in parallel. These contain the patient's same serum sample spiked with saturated zinc, making them insensitive to the sample's native zinc level. Their output color is controlled by varying the concentration of the pZntR plasmid.
- Quantification: The color of the test reaction is matched to the color of the reference standard reactions at a specific time point. This sample-specific calibration accounts for matrix effects and allows for zinc concentration determination.
The workflow for this quantitative diagnostic platform is as follows:
The Scientist's Toolkit: Research Reagent Solutions
Table 3: Essential Reagents for Nutritional Biomarker Research
| Reagent / Material | Function / Application | Example Biomarkers |
|---|---|---|
| 24-Hour Urine Collection Kits | Gold-standard sample for recovery biomarkers of nutrient intake. | Nitrogen (protein), Potassium, Sodium, Total Urinary Polyphenols (TUP) [90] [8] [92] |
| Blood Collection Tubes (Trace-element free) | Prevents contamination for accurate measurement of micronutrients in plasma/serum. | Zinc, Ferritin, Retinol, Carotenoids, Vitamin C [8] [91] [93] |
| Antibody-based Assay Kits (ELISA/Immunoassay) | Quantifying specific protein biomarkers or nutrients bound to carrier proteins. | Ferritin, Retinol-Binding Protein (RBP), C-reactive Protein (CRP), α-1 acid glycoprotein (AGP) [91] |
| Cell-Free Expression (CFE) System | A lyophilized, field-deployable platform for developing low-cost, quantitative colorimetric tests for various biomarkers. | Zinc, other micronutrients, nucleic acids [93] |
| HPLC/MS Standards & Columns | The reference technique for separating and quantifying a wide array of biomarkers with high specificity and sensitivity. | Carotenoids, Polyphenol metabolites, Alkylresorcinols, Fatty Acids [92] |
Troubleshooting Guides
Troubleshooting Guide for Kappa Statistics
| Problem | Possible Cause | Solution |
|---|---|---|
| Low Kappa value despite high observed agreement | High prevalence index: Agreement is high by chance alone due to uneven category distribution [94]. | Calculate and report the prevalence index. Consider using prevalence-adjusted kappa or other statistical measures [94]. |
| Kappa value is statistically significant but magnitude is low | Limited interpretation scope. A significant p-value indicates the agreement is not due to chance, but the low kappa value suggests poor agreement strength [94]. | Focus on the kappa point estimate and its confidence interval for interpretation, not the p-value. Refer to standard benchmarks for kappa interpretation (e.g., <0.20 poor, 0.61-0.80 substantial, etc.) [94]. |
| Different Kappa values from weighted vs. unweighted analysis | Disagreements of varying seriousness. Unweighted kappa treats all disagreements equally, while weighted kappa accounts for the degree of disagreement (e.g., for ordinal data) [95]. | Use weighted kappa when some disagreements are more serious than others. Ensure the choice of weights is predefined and clinically justified [95]. |
Troubleshooting Guide for Correlation Analysis in Biomarker Studies
| Problem | Possible Cause | Solution |
|---|---|---|
| High correlation but poor agreement between two biomarker measurement methods [96] | Inappropriate use of correlation. Correlation measures linear relationship strength, not agreement. Wide data spread can produce high correlation even with consistent differences [96]. | Use Bland-Altman analysis to assess agreement instead of, or in addition to, correlation [96]. |
| Low correlation between two biomarkers expected to be related (e.g., PCT and CRP) [97] | Biomarkers reflect different biological pathways. Low correlation may be biologically real, not a statistical error [97]. | Review biological literature on the biomarkers. The low correlation may be a valid finding indicating the biomarkers capture distinct processes [97]. |
| Inflated correlation coefficient | Restricted data range. If the biomarker values do not cover a wide concentration range, the correlation may be underestimated [96]. | Ensure study samples cover the full expected physiological and pathological range of the biomarker [96]. |
Troubleshooting Guide for Bland-Altman Analysis
| Problem | Possible Cause | Solution |
|---|---|---|
| Proportional bias (difference between methods increases as the average value increases) [98] | Systematic measurement error that is scale-dependent. One method may have a non-constant bias [98]. | Log-transform the data before creating the Bland-Altman plot to address multiplicative error. Alternatively, report agreement as a percentage of the mean [98]. |
| Widening Limits of Agreement (LoA) with increasing average (heteroscedasticity) [98] | Measurement variability is not constant across the measurement range. The error of one method is magnitude-dependent [98]. | As for proportional bias, use log-transformation or percentage differences. Visually inspect the plot for a funnel-shaped pattern indicating this issue [98]. |
| Limits of Agreement are too wide for clinical use | High random error or inherent method imprecision. The two methods are not interchangeable [96]. | The analysis correctly identifies unacceptable agreement. Determine acceptable limits a priori based on clinical/biological relevance. The method may need refinement [96]. |
Frequently Asked Questions (FAQs)
Kappa Statistics
Q1: What is the key difference between Kappa and simple percent agreement? Kappa statistic corrects for the agreement expected to occur by chance alone, providing a more robust measure of reliability than raw percent agreement [94].
Q2: What sample size is needed for a Kappa reliability study? Sample size requirements depend on the true value of kappa and the number of categories. For example, to test a null hypothesis kappa of 0.4 against an alternative kappa of 0.7 with 80% power, approximately 45 to 90 participants are required [94].
Correlation
Q3: Why is a high correlation coefficient misleading for method comparison? A high correlation indicates a strong linear relationship but does not mean the two methods agree. One method could consistently produce values 20% higher than the other, yet the correlation could be perfect. Correlation assesses relationship, not agreement [96].
Q4: How should we handle biomarker data from multiple studies that used different assays? A latent variable model approach can be used. This involves a "bridging study" where a subset of samples is re-analyzed across the different methods to model a underlying true biomarker value and harmonize the data for correlational analysis with clinical outcomes [99].
Bland-Altman Analysis
Q5: My data shows proportional bias in the Bland-Altman plot. What should I do? A log-transformation of the raw data before constructing the plot is often the recommended approach. This converts a proportional bias (multiplicative error) into a constant bias (additive error), making the limits of agreement valid across the measurement range [98].
Q6: Who defines what "acceptable" Limits of Agreement are? The researcher must define acceptable limits a priori based on clinical criteria or biological relevance. The Bland-Altman method defines the interval where 95% of differences lie, but only a domain expert can judge if this interval is narrow enough for the two methods to be used interchangeably [96].
Experimental Protocols for Key Analyses
Protocol 1: Conducting a Bland-Altman Analysis for Method Comparison
Purpose: To assess the agreement between two quantitative methods for measuring the same nutritional biomarker (e.g., comparing a new point-of-care device to a gold standard laboratory assay).
Materials:
- Paired measurements from the two methods on the same set of samples.
- Statistical software (e.g., R, MedCalc, SPSS, GraphPad Prism).
Procedure:
- Data Collection: Obtain
npaired measurements(A_i, B_i)from the two methods. Ensure the sample covers the entire expected concentration range of the biomarker [96]. - Calculate Differences and Averages: For each pair
i, compute the difference(D_i = A_i - B_i)and the average(M_i = (A_i + B_i)/2)[96]. - Plot the Data: Create a scatter plot where the X-axis is the average of the two measurements
(M_i)and the Y-axis is the difference between them(D_i)[98] [96]. - Calculate Mean Difference and Limits of Agreement:
- Compute the mean difference
(d̄), which estimates the average bias between methods. - Compute the standard deviation (SD) of the differences.
- Calculate the 95% Limits of Agreement:
d̄ ± 1.96 * SD[96].
- Compute the mean difference
- Plot Mean and LoA: On the scatter plot, draw a horizontal line for the mean difference, and two additional lines for the upper and lower limits of agreement [96].
- Check Assumptions: Visually inspect the plot for whether the spread of differences is consistent across the range of averages (homoscedasticity) and if the differences are normally distributed (e.g., using a histogram) [98] [96].
Protocol 2: Assessing Rater Agreement for Ordinal Biomarker Scores using Weighted Kappa
Purpose: To evaluate the reliability of two or more raters who are classifying nutritional status (e.g., deficiency, insufficiency, sufficiency) using an ordinal scale.
Materials:
- A set of subjects or samples independently rated by multiple raters using the same ordinal categories.
- Statistical software capable of calculating weighted kappa.
Procedure:
- Study Design: A minimum of 50 subjects is often recommended for kappa studies, though formal sample size calculations are preferable [94]. Ensure raters are blinded to each other's assessments.
- Data Collection: Collect the categorical ratings from all raters for all subjects. Organize the data into a contingency table (rater A vs. rater B).
- Choose Weights: Select an appropriate weighting scheme (e.g., linear or quadratic). Quadratic weights are more severe for larger disagreements [95].
- Calculate Kappa: Use statistical software to compute the weighted kappa coefficient. The software will calculate the observed agreement and the agreement expected by chance.
- Interpret the Result: Interpret the kappa value using established benchmarks. Report the kappa value, its confidence interval, and the weighting scheme used [94] [95].
Workflow and Relationship Visualizations
Research Reagent Solutions for Biomarker Validation
| Item | Function in Validation Context |
|---|---|
| Reference Standard (Calibrator) | A material with a known concentration of the biomarker used to calibrate measurement instruments and ensure accuracy across different assay runs and laboratories [91]. |
| Quality Control (QC) Samples | Pools of sample matrix (e.g., serum) with high, medium, and low biomarker concentrations. Run alongside test samples to monitor assay precision and stability over time [91]. |
| Bridging Study Samples | A subset of samples that are shared and re-analyzed across different laboratory sites or assay platforms. Essential for harmonizing data and enabling combined analysis in multi-center studies [99]. |
| Antibody-based Assay Kits (e.g., ELISA) | Common reagents for measuring specific protein biomarkers (e.g., CRP). Require thorough validation, as performance can vary significantly between manufacturers and lots [91] [97]. |
| Clinical Outcome Measures | Standardized and reliably measured clinical variables (e.g., cognitive test scores, disease severity scores). Used as the reference to validate the correlation and predictive value of the nutritional biomarker [99]. |
Frequently Asked Questions (FAQs)
What are the most common sources of variability in nutritional biomarker measurements? Variability often arises from inconsistencies in specimen collection and handling, assay selection and performance, and data management practices. For example, differences in blood collection procedures, storage conditions (such as freeze-thaw cycles), and the use of unstandardized commercial assay kits can significantly impact results like plasma zinc or CRP concentrations [6].
How should we handle biomarker values below the assay's detection limit? Values below the lower limit of quantification (LLOQ) require careful data analysis. Inappropriate handling, such as simply excluding these samples, can bias study findings. Recognized approaches include substitution with an arbitrary value (e.g., half the LLOQ) or using more sophisticated statistical methods like multiple imputation [6].
Why is it critical to report detailed laboratory assay protocols? Complete disclosure of assay protocols, performance characteristics (like intra- and inter-assay coefficients of variation), and technical limitations (like LLOQ) is essential for the interpretability and reproducibility of published findings. It also enables coherent pooling of data in meta-analyses, a challenge noted in studies like those from the BRINDA consortium [6].
Our experiment failed; what are the first steps we should take?
- Repeat the experiment if cost and time allow, as simple mistakes can happen [3].
- Analyze all elements individually, checking for expired reagents, improper storage conditions, and equipment calibration [100].
- Review your controls to confirm the experiment actually failed and wasn't just an unexpected biological result [3].
We observed a dim signal in our immunoassay; what could be the cause? A dim signal could indicate a protocol problem, such as insufficient antibody concentration, too short an incubation time, or reagents that have degraded due to improper storage. However, it could also mean the target protein is expressed at low levels. Using a positive control is crucial to determine the true cause [3].
Troubleshooting Guides
Guide: Troubleshooting Immunoassays (e.g., ELISA)
Immunoassays are common for measuring biomarkers like CRP, ferritin, or vitamin B12. This guide addresses common issues like weak or no signal [3] [6] [83].
Problem: Weak, dim, or absent signal.
Step-by-Step Troubleshooting Process:
- Identify and Define the Problem: Clearly state the issue—e.g., "The fluorescence signal in the ELISA is 50% lower than the positive control." Avoid assuming the cause at this stage [83].
- List All Possible Explanations: Brainstorm potential causes. For a weak signal, consider [3] [6] [83]:
- Reagent Issues: Primary/secondary antibody concentration too low; antibodies expired or stored improperly; incompatible antibody pair; substrate degradation.
- Protocol Issues: Incubation time too short; over-fixation; excessive washing.
- Sample Issues: Target biomarker concentration below LLOQ; biomarker degraded due to poor specimen handling.
- Equipment Issues: Improper calibration of plate reader or imager.
- Collect Data and Eliminate Possibilities:
- Check controls: A failed positive control suggests a general protocol or reagent issue. A valid positive control points to a sample-specific problem [83].
- Review documentation: Verify that the protocol was followed exactly, noting any deviations [83].
- Inspect reagents: Confirm storage conditions and expiration dates. Visually inspect solutions for precipitates or cloudiness [3].
- Test Systematically with Experimentation: Change only one variable at a time [3].
- Example: Test a range of primary antibody concentrations in parallel. If that doesn't work, test a range of secondary antibody concentrations.
- Identify the Root Cause and Implement a Solution: Based on your experimental results, identify the cause (e.g., "The secondary antibody was used at a 1:1000 dilution, but the optimal dilution is 1:500"). Document the solution for future experiments [83].
The logical workflow for this troubleshooting process is outlined below.
Guide: Addressing Unexplained Variability in Biomarker Data
This guide helps when data shows high variability or inconsistent correlations between biomarkers, as encountered in large studies like EPIC-Norfolk and BRINDA [6].
Problem: High unexplained between-assay variation or inconsistent results across study sites.
Step-by-Step Troubleshooting Process:
- Audit Laboratory Protocols: Compare detailed protocols from all involved labs. Look for differences in [6]:
- Specimen handling: Blood collection tubes, processing time, freeze-thaw cycles.
- Assay methods: Manufacturers, kit lots, platform types (e.g., different ELISA kits for CRP).
- Data handling: Methods for dealing with values below LLOQ.
- Review Performance Characteristics: Collect key performance metrics for each assay used. Essential metrics are summarized in the table below.
- Standardize and Harmonize:
- If possible, re-analyze a subset of samples from all sites in a single, reference laboratory.
- Use standardized control materials across all labs.
- For future studies, mandate the use of identical, validated kits and protocols [6].
- Audit Laboratory Protocols: Compare detailed protocols from all involved labs. Look for differences in [6]:
Table 1: Essential Laboratory Assay Characteristics for Audit
| Category | Parameter to Check | Why It Matters |
|---|---|---|
| Assay Performance | Intra- and Inter-assay Coefficient of Variation (CV) | Measures precision and reproducibility of the assay [6]. |
| Sensitivity | Limit of Detection (LOD) / Lower Limit of Quantification (LLOQ) | Defines the lowest concentration that can be reliably measured; critical for low-abundance biomarkers [6]. |
| Dynamic Range | Upper Limit of Quantification (ULOQ) | The highest concentration that can be accurately measured; may require sample dilution [6]. |
| Specimen Handling | Collection materials, processing time, storage temperature | Inconsistent handling can degrade biomarkers and introduce error [6]. |
| Reagent Specifics | Manufacturer, product number, kit lot | Different kits and lots can yield variable results [6]. |
The following diagram illustrates the key stages for standardizing biomarker measurement protocols.
The Scientist's Toolkit
Table 2: Key Research Reagent Solutions for Nutritional Biomarker Research
| Item | Function / Description | Technical Considerations |
|---|---|---|
| Validated ELISA Kits | Antibody-based assays to quantify specific biomarkers (e.g., CRP, ferritin). | Select kits with strong validation data. Check for cross-reactivity and ensure LLOQ is suitable for your study population [6]. |
| Trace Element-Free Collection Tubes | Blood collection tubes specifically designed for mineral nutrient analysis (e.g., zinc, selenium). | Prevents contamination of samples, which is critical for accurate measurement of trace elements [6]. |
| Standard Reference Materials (SRMs) | Certified control materials with known analyte concentrations. | Used for assay validation, calibration, and quality control to ensure accuracy and enable cross-lab comparison [6]. |
| Competent Cells | Specially prepared bacterial cells for molecular cloning (e.g., plasmid propagation). | Check transformation efficiency and ensure proper storage (-80°C) to maintain viability [83]. |
| Primary & Secondary Antibodies | Key reagents for immunoassays; the primary binds the target, the secondary enables detection. | Verify compatibility, optimal concentration, and species reactivity. improper storage can lead to degradation and signal loss [3]. |
| Master Mixes (e.g., PCR) | Pre-mixed solutions containing necessary reagents for a reaction. | Reduces pipetting errors and improves reproducibility. Check expiration dates and store according to manufacturer instructions [83]. |
Conclusion
The standardization of nutritional biomarker protocols is not merely a technical exercise but a fundamental requirement for advancing robust and reproducible research in nutrition science and drug development. Synthesizing the key intents, a successful framework must be built on a clear understanding of biomarker classifications, rigorously applied methodological standards, proactive strategies to mitigate confounding factors, and robust validation against reference methods. Future directions will be shaped by the integration of AI and machine learning for predictive analytics, the expansion of multi-omics platforms for comprehensive biomarker signatures, and the development of increasingly sensitive, non-invasive tools like advanced liquid biopsies. Collaborative efforts among academia, industry, and regulatory bodies are essential to establish universal standards, ultimately strengthening the evidence base for dietary guidelines, personalized nutrition, and therapeutic development.
References
- 1. assessment - Nutritional Biomarkers [https://nutritionalassessment.org/biomarkers/]
- 2. Toolkit - Measurement Nutritional biomarkers [https://www.measurement-toolkit.org/diet/objective-methods/biomarkers]
- 3. Troubleshooting Protocols - Biological Sciences: Summer Research Institute (SRI) - CMU LibGuides at Carnegie Mellon University [https://guides.library.cmu.edu/biologicalsciencesSRI/troubleshooting]
- 4. PCR Troubleshooting Tips | Boster Bio [https://www.bosterbio.com/protocol-and-troubleshooting/pcr-troubleshooting]
- 5. RNAscope Troubleshooting Guide and FAQ | Troubleshooting [https://acdbio.com/technical-support/solutions]
- 6. Standardization of laboratory practices and reporting of biomarker data... [https://pmc.ncbi.nlm.nih.gov/articles/PMC7396261/]
- 7. What are Biomarkers ? - PMC [https://pmc.ncbi.nlm.nih.gov/articles/PMC3078627/]
- 8. Biomarkers of Nutrition and Health: New Tools for New Approaches - PMC [https://pmc.ncbi.nlm.nih.gov/articles/PMC6567133/]
- 9. Challenges and Lessons Learned in Generating and Interpreting NHANES Nutritional Biomarker Data - PMC [https://pmc.ncbi.nlm.nih.gov/articles/PMC5347107/]
- 10. The Fundamental Difficulty With Evaluating the Accuracy of... [https://pmc.ncbi.nlm.nih.gov/articles/PMC4609557/]
- 11. The Biomarker Revolution in Medicine and Drug Development [https://www.pharmasalmanac.com/articles/the-biomarker-revolution-in-medicine-and-drug-development]
- 12. What Are Biomarkers ? Definition, Applications and Updates for 2025 [https://blog.omni-inc.com/blog/what-are-biomarkers-and-whats-new-in-2025]
- 13. Validation of Analytical Methods for Biomarkers Employed in Drug Development - PMC [https://pmc.ncbi.nlm.nih.gov/articles/PMC2744124/]
- 14. Methods for Evaluation of medical prediction Models, Tests And... [https://diagnprognres.biomedcentral.com/articles/10.1186/s41512-018-0036-3]
- 15. Biomarkers of Nutrition for Development ( BOND )-Vitamin A Review [https://pubmed.ncbi.nlm.nih.gov/27511929/]
- 16. Nutrient biomarkers: NIH program aims to aid evidence-based policy [https://www.nutraingredients.com/Article/2011/07/12/Nutrient-biomarkers-NIH-program-aims-to-aid-evidence-based-policy/]
- 17. The State Of: Multi - Omics [https://frontlinegenomics.com/the-state-of-multi-omics/]
- 18. Proteomic Workflows for Biomarker Identification Using Mass Spectrometry — Technical and Statistical Considerations during Initial Discovery - PMC [https://www.ncbi.nlm.nih.gov/pmc/articles/PMC5302744/]
- 19. Biomarker Discovery and Validation: Statistical Considerations - PMC [https://pmc.ncbi.nlm.nih.gov/articles/PMC8012218/]
- 20. Biomarker Program FAQs | National Institute of Neurological Disorders and Stroke [https://www.ninds.nih.gov/current-research/focus-tools-topics/biomarkers-research/biomarker-program-faqs]
- 21. Frontiers | A practical guide to FAIR data management in the age of... [https://www.frontiersin.org/journals/immunology/articles/10.3389/fimmu.2024.1439434/full]
- 22. : The Key to Biomarkers Insights Nutritional [https://www.numberanalytics.com/blog/biomarkers-key-nutritional-insights]
- 23. 3D IntelliGenes: AI /ML application using multi - omics data... | medRxiv [https://www.medrxiv.org/content/10.1101/2025.03.25.25324634v1]
- 24. ACCESSIBLE CHARTS: Color Contrast Tip for Better Visual Design | [https://accessiblewebsiteservices.com/accessible-charts-color-contrast-tip-for-better-design/]
- 25. Precision nutrition: Maintaining scientific integrity while realizing market potential - PMC [https://www.ncbi.nlm.nih.gov/pmc/articles/PMC9481417/]
- 26. Precision nutrition: A review of current approaches and future endeavors - ScienceDirect [https://www.sciencedirect.com/science/article/abs/pii/S0924224422003673]
- 27. Frontiers | Precision in sports science: an opinion on... nutrition [https://www.frontiersin.org/journals/nutrition/articles/10.3389/fnut.2025.1611440/full]
- 28. Integrating biological age, epigenetic clocks, and telomere length in... [https://pubmed.ncbi.nlm.nih.gov/40714351/]
- 29. Standardized Metrics Capture Most, Not All Clinical Trial Risks [https://www.appliedclinicaltrialsonline.com/view/standardized-metrics-capture-most-not-all-risks]
- 30. of Biomarkers and Health: New Tools for New Approaches Nutrition [https://pubmed.ncbi.nlm.nih.gov/31100942/]
- 31. Advancing precision nutrition: bridging mechanistic insight and clinical implementation | Nature Reviews Endocrinology [https://www.nature.com/articles/s41574-025-01141-9]
- 32. SPIRIT 2025 Statement: Defining standard protocol items for clinical ... [https://www.equator-network.org/reporting-guidelines/spirit-2013-statement-defining-standard-protocol-items-for-clinical-trials/]
- 33. CONSORT 2025 : Setting New Standards for Clinical ... | Conexiant Trial [https://conexiant.com/internal-medicine/articles/consort-2025-setting-new-standards-for-clinical-trial-reporting/]
- 34. Standardization of clinical trials - PMC [https://pmc.ncbi.nlm.nih.gov/articles/PMC5308078/]
- 35. , Plasma , and Urine Biomarkers of Dietary Intake... Adipose Tissue [https://pmc.ncbi.nlm.nih.gov/articles/PMC6461718/]
- 36. Establishment of reference values of α-tocopherol in plasma , red blood... [https://ojrd.biomedcentral.com/articles/10.1186/s13023-016-0498-8]
- 37. Metabolic profiling, metabolomic and metabonomic... | Nature Protocols [https://www.nature.com/articles/nprot.2007.376?error=cookies_not_supported&code=c8a91050-dc87-40ed-bc02-c882a0520a17]
- 38. Specimen Handling - an overview | ScienceDirect Topics [https://www.sciencedirect.com/topics/biochemistry-genetics-and-molecular-biology/specimen-handling]
- 39. 5 Findings, Conclusions, and Recommendations | Conducting Biosocial... [https://nap.nationalacademies.org/read/12942/chapter/7]
- 40. - Pre Variation | myadlm.org Analytical [https://myadlm.org/cln/articles/2016/july/preanalytical-variation-the-leading-cause-of-error-in-laboratory-medicine]
- 41. Recommendations and Best Practices for Standardizing the... [https://pmc.ncbi.nlm.nih.gov/articles/PMC7344701/]
- 42. - Pre in cardiovascular biomarker testing analytic variability [https://jtd.amegroups.org/article/view/5482/html]
- 43. Intake Biomarkers for Nutrition and Health: Review and Discussion of Methodology Issues - PMC [https://pmc.ncbi.nlm.nih.gov/articles/PMC11123464/]
- 44. Best practices for RNA storage and sample handling | QIAGEN [https://www.qiagen.com/us/knowledge-and-support/knowledge-hub/bench-guide/rna/introduction/general-remarks-on-rna-handling-storage-and-stabilization]
- 45. FDA Guidance for Industry on Bioanalytical Method Validation (BMV) for Biomarkers [https://labs.iqvia.com/blog/fda-guidance-bioanalytical-method-validation-biomarkers]
- 46. How to Prevent During Sample Degradation Storage [https://www.linkedin.com/advice/1/how-can-you-prevent-sample-degradation-during-12odf]
- 47. and Objective Dietary Intake... | F1000 Standardised Research [https://f1000research.com/articles/13-1144]
- 48. Discovery: Biomarker Strategies Advancing Precision... Analytical [https://www.sepscience.com/biomarker-discovery-analytical-strategies-advancing-precision-medicine-12047]
- 49. Data Analysis Pipelines, Potential Pitfalls, and Troubleshooting for... [https://link.springer.com/chapter/10.1007/978-981-97-5045-0_7]
- 50. Dietary biomarkers: advances, limitations and future directions | Nutrition Journal | Full Text [https://nutritionj.biomedcentral.com/articles/10.1186/1475-2891-11-109]
- 51. Evaluation of Vitamin D Standardization Program protocols for standardizing serum 25-hydroxyvitamin D data: a case study of the program's potential for national nutrition and health surveys1 - PMC [https://pmc.ncbi.nlm.nih.gov/articles/PMC3652922/]
- 52. Standardizing Vitamin D Assays: The Way Forward - PMC [https://www.ncbi.nlm.nih.gov/pmc/articles/PMC5443565/]
- 53. of serum fat- Lipid antioxidant concentrations... standardization soluble [https://experts.umn.edu/en/publications/lipid-standardization-of-serum-fat-soluble-antioxidant-concentrat]
- 54. Fat-Soluble Vitamins: Clinical Indications and Current Challenges for Chromatographic Measurement - PMC [https://pmc.ncbi.nlm.nih.gov/articles/PMC4810759/]
- 55. Solubilization of Lipid - Soluble by Complexation with... Vitamins [https://www.jstage.jst.go.jp/article/cpb1958/38/7/38_7_2047/_article]
- 56. Assessment of antioxidative activity of lipid - and water- soluble ... [https://pubmed.ncbi.nlm.nih.gov/15830916/]
- 57. Effects of hemolysis on routine... - Biochemia Medica interference [https://www.biochemia-medica.com/en/journal/21/1/10.11613/BM.2011.015]
- 58. , consequences and management of Causes in the... sample hemolysis [https://pubmed.ncbi.nlm.nih.gov/28947321/]
- 59. Methods for Hemolysis Study in Laboratory Medicine... Interference [https://pmc.ncbi.nlm.nih.gov/articles/PMC7109502/]
- 60. Analytical and Clinical Interference of Sample Hemolysis in Evaluating Blood Biochemical and Endocrine Parameters in Cows [https://www.mdpi.com/2076-2615/14/12/1773]
- 61. Potential analytical in cardiac troponin immunoassays interferences [https://jlpm.amegroups.org/article/view/7629/html]
- 62. , consequences and management of Causes in the... sample hemolysis [https://scispace.com/papers/causes-consequences-and-management-of-sample-hemolysis-in-3kqo3jeutg]
- 63. 25-Hydroxyvitamin D variability within-person due to diurnal ... rhythm [https://jmedicalcasereports.biomedcentral.com/articles/10.1186/s13256-018-1948-9]
- 64. in critical care Biomarkers | Critical Care | Full Text nutrition [https://ccforum.biomedcentral.com/articles/10.1186/s13054-020-03208-7]
- 65. Blood Biomarker Profiling and Monitoring for High-Performance... [https://link.springer.com/article/10.1007/s40279-019-01158-x]
- 66. Biomarker data with measurement error in medical research: A literature review - PMC [https://pmc.ncbi.nlm.nih.gov/articles/PMC11305697/]
- 67. Use of biomarkers in epidemiologic studies: minimizing the influence of measurement error in the study design and analysis - PubMed [https://pubmed.ncbi.nlm.nih.gov/16841256/]
- 68. JMIR Formative Research - Multimodal Noninvasive Assessment of... [https://formative.jmir.org/2025/1/e77108]
- 69. Analytical Challenges and Metrological Approaches to Ensuring Dietary Supplement Quality: International Perspectives - PMC [https://pmc.ncbi.nlm.nih.gov/articles/PMC8787362/]
- 70. Challenges in Developing Analytically Validated Laboratory-Derived Dietary Supplement Databases - PubMed [https://pubmed.ncbi.nlm.nih.gov/31505676/]
- 71. Dietary Supplements: Regulatory Challenges and Research Resources - PMC [https://pmc.ncbi.nlm.nih.gov/articles/PMC5793269/]
- 72. Diet Item Details: Reporting Checklist for Feeding Studies Measuring the Dietary Metabolome (DID-METAB Checklist)—Explanation and Elaboration Report on the Development of the Checklist by the DID-METAB Delphi Working Group - PMC [https://pmc.ncbi.nlm.nih.gov/articles/PMC12076792/]
- 73. Challenges and Future Trends in Biomarker for Clinical... Analysis [https://blog.crownbio.com/challenges-and-future-trends-in-biomarker-analysis-for-clinical-research-whats-ahead-in-2025]
- 74. A new way to detect inflammation | ScienceDaily [https://www.sciencedaily.com/releases/2025/02/250206134600.htm]
- 75. A Practical Guide to Adjust Micronutrient Biomarkers for Inflammation... [https://pubmed.ncbi.nlm.nih.gov/36792034/]
- 76. A Practical Guide to Adjust Micronutrient Biomarkers for Inflammation Using the BRINDA Method - ScienceDirect [https://www.sciencedirect.com/science/article/pii/S0022316623111059]
- 77. Methodologic approach for the Biomarkers Reflecting Inflammation and Nutritional Determinants of Anemia (BRINDA) project - PMC [https://pmc.ncbi.nlm.nih.gov/articles/PMC5490643/]
- 78. Predictors of anemia in women of reproductive age: Biomarkers ... [https://pubmed.ncbi.nlm.nih.gov/28615262/]
- 79. Guidelines for Designing and Evaluating Feasibility Pilot - PMC Studies [https://pmc.ncbi.nlm.nih.gov/articles/PMC8849521/]
- 80. and removal of technical variation of NMR metabolic... Quality control [https://www.nature.com/articles/s41597-023-01949-y?error=cookies_not_supported&code=b1077aa5-c5b8-45c4-ac62-52f67eeb969a]
- 81. Nucleic Acid Gel Electrophoresis Troubleshooting | Thermo Fisher Scientific - US [https://www.thermofisher.com/us/en/home/life-science/cloning/cloning-learning-center/invitrogen-school-of-molecular-biology/na-electrophoresis-education/na-electrophoresis-troubleshooting.html]
- 82. Trouble Shooting DNA electrophoresis [https://www.bio.davidson.edu/courses/molbio/tips/trbldnagel.html]
- 83. How to be a Better Troubleshooter in Your Laboratory | GoldBio [https://goldbio.com/articles/article/how-to-be-a-better-troubleshooter]
- 84. Pooled results from 5 validation studies of dietary self - report ... [https://pubmed.ncbi.nlm.nih.gov/24918187/]
- 85. Best practices for the development and fit-for-purpose validation of biomarker methods: a conference report | AAPS Open | Full Text [https://aapsopen.springeropen.com/articles/10.1186/s41120-021-00050-1]
- 86. The 2025 FDA Biomarker Guidance: Understanding the Evolution from... [https://www.linkedin.com/pulse/2025-fda-biomarker-guidance-understanding-lxoke]
- 87. Biomarker Validation: Common Data Analysis Concerns - PMC [https://pmc.ncbi.nlm.nih.gov/articles/PMC4122484/]
- 88. View Protocols | Bio-Techne [https://www.bio-techne.com/resources/protocols-troubleshooting]
- 89. sciencedirect.com/topics/medicine-and-dentistry/ nutritional - biomarker [https://www.sciencedirect.com/topics/medicine-and-dentistry/nutritional-biomarker]
- 90. of women's diet assessed by Comparison and FFQs - 24 ... hour recalls [https://pubmed.ncbi.nlm.nih.gov/16877864/]
- 91. Standardization of laboratory practices and reporting of biomarker data in clinical nutrition research - PMC [https://www.ncbi.nlm.nih.gov/pmc/articles/PMC7396261/]
- 92. (PDF) Validating Polyphenol Intake Estimates From... - Academia.edu [https://www.academia.edu/107719601/Validating_Polyphenol_Intake_Estimates_From_a_Food_Frequency_Questionnaire_Using_Repeated_24_Hour_Dietary_Recalls_and_a_Unique_Method_of_Triads_Approach_With_Two_Biomarkers]
- 93. Point-of-care biomarker quantification enabled by sample-specific calibration - PMC [https://pmc.ncbi.nlm.nih.gov/articles/PMC6760921/]
- 94. The kappa in statistic studies: use, interpretation, and... reliability [https://pubmed.ncbi.nlm.nih.gov/15733050/]
- 95. sciencedirect.com/topics/computer-science/ kappa - coefficient [https://www.sciencedirect.com/topics/computer-science/kappa-coefficient]
- 96. Understanding Bland Altman analysis - PMC [https://pmc.ncbi.nlm.nih.gov/articles/PMC4470095/]
- 97. Infection biomarkers in primary care patients with acute respiratory... [https://bmcpulmmed.biomedcentral.com/articles/10.1186/s12890-016-0206-4]
- 98. Bland–Altman plot - Wikipedia [https://en.wikipedia.org/wiki/Bland%E2%80%93Altman_plot]
- 99. of Correlational that are harmonized through... analyses biomarkers [https://pmc.ncbi.nlm.nih.gov/articles/PMC10939855/]
- 100. How to Troubleshoot Experiments that Just Aren’t Working | Blog | ZAGENO [https://go.zageno.com/blog/how-to-troubleshoot-experiments-that-just-arent-working]